Routine Maintenance and Cleaning
Cleaning the Imaging Bed
With infrared imaging, any residue on the imaging bed surface from previous image acquisitions will likely be visible in new image acquisitions. Before each image acquisition, clean the imaging bed surface with a solution of 0.5% chlorine bleach , ethanol, or isopropanol. Prepackaged sterile isopropanol pads are included in the Pearl Imaging System spare parts kit. Prep pads, such as Fisherbrand® Cat. #06-669-62, also provide a convenient cleanup method. If isoflurane gas is still flowing from the previous image acquisition, make sure the nose cone plug is tightly inserted in the nose cone while cleaning (see Installation). Before placing a mouse on the imaging bed, make sure the surface is dry.
CAUTION: Strong solvents, including DMSO, will permanently discolor the imaging bed surface. Avoid all contact. In addition, any IRDye® products in DMSO will incorporate into the surface of the imaging bed and will be visible in images.
ATTENTION:
Les dissolvants forts, y compris DMSO, décoloreront de manière permanente la surface du lit d'image. Évitez tout contact. En outre, tous les produits d'IRDye dans DMSO incorporeront à la surface du lit et seront évidents dans les images.
Whenever possible, inject the animal on a separate surgical bed and clean any exterior dye product on the animal before transferring the animal onto the Pearl® Imaging System imaging bed. In the event that the imaging bed becomes contaminated with dye, wipe with Nair® hair remover and thoroughly clean and dry before use.
Routine Maintenance
Routine Maintenance
The Pearl Imager requires only minimal maintenance. However, as with any equipment utilizing electrical voltages, there is a danger of fire or electrical shock if the equipment is not properly maintained. Disconnect power before servicing. LI‑COR Biosciences recommends that you routinely inspect the system. The following are some general maintenance guidelines:
- Clean the exterior case parts with warm water and a damp cloth. The imaging
- Wipe all chemical spills from the case and imaging
- Keep the imaging
- Inspect all cables and power cords for evidence of fraying, exposed wire, or loose connections.
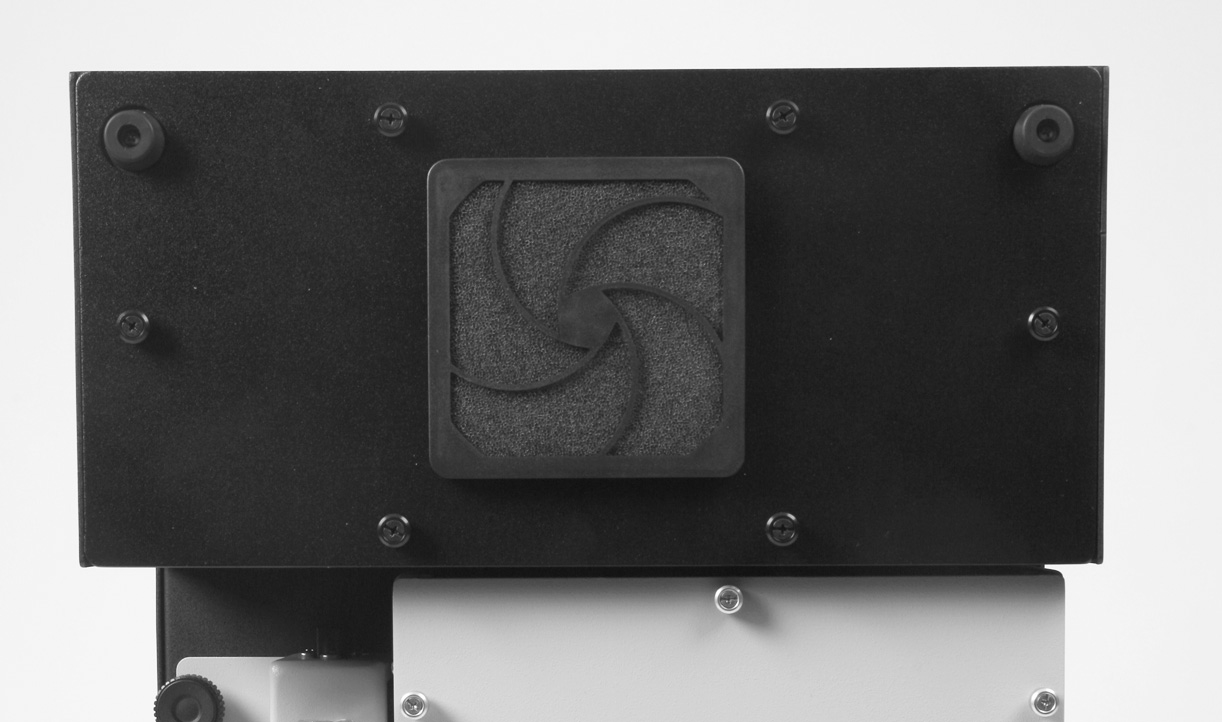
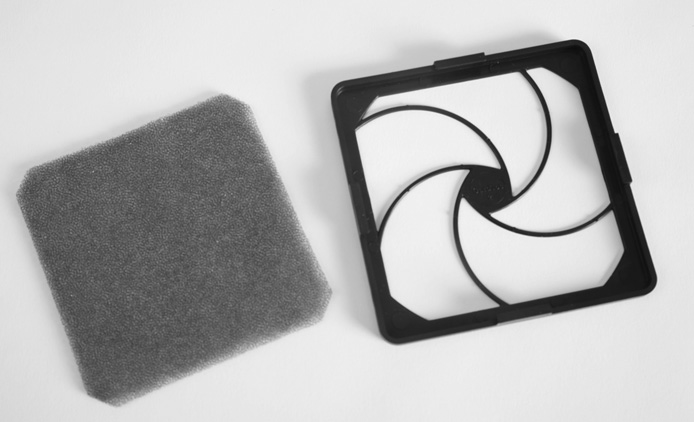
Cleaning the Fan Filter
The air intake fan on the back of the Pearl instrument is used to cool the internal electronics and maintain fresh air circulation throughout the internal volume of the instrument.
The back cover snaps off for access to the foam filter. The filter can generally be rinsed out, dried, and replaced if it is only clogged with dust.
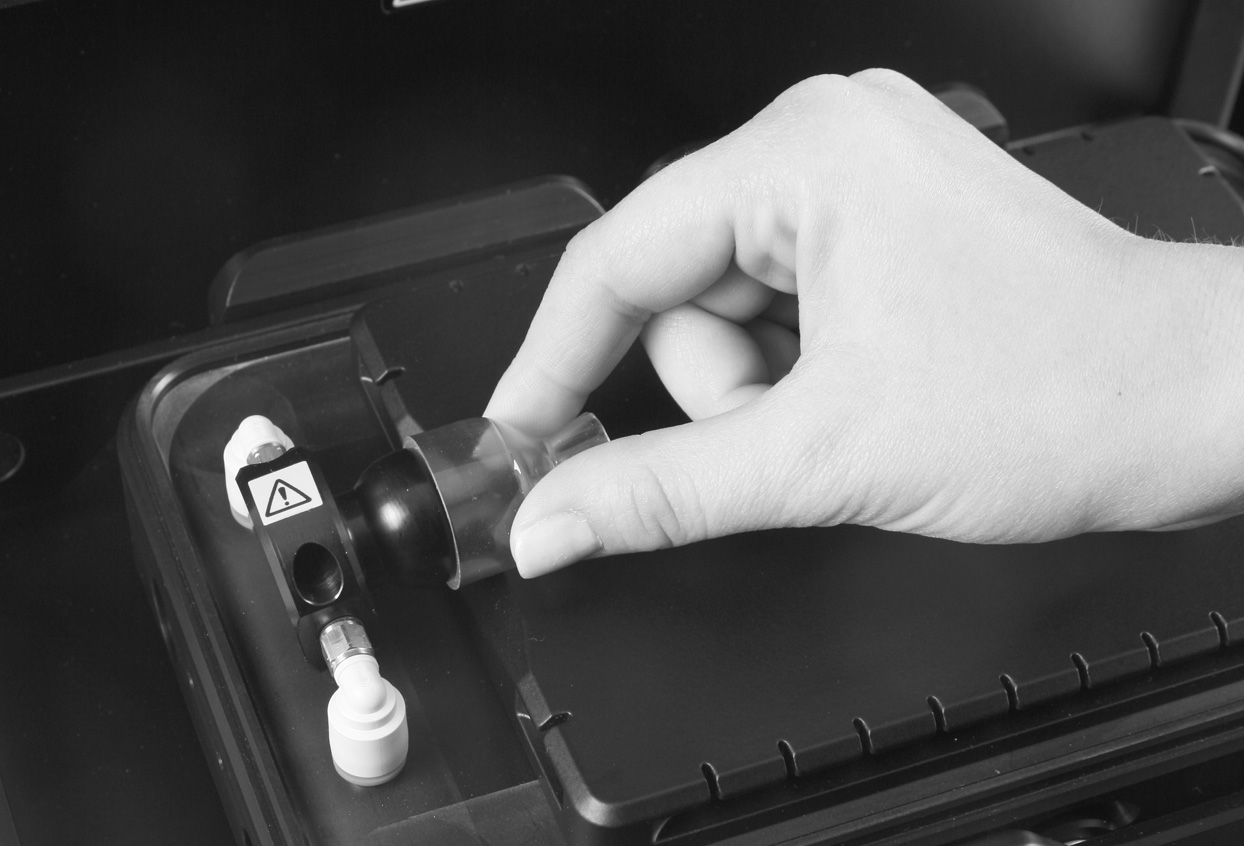
Nose Cone Replacement
The nose cone may need to be replaced occasionally for sanitary or other reasons. New nose cones can be purchased from LI-COR. The nose cone can be removed by grasping the tip and pulling it straight off (parallel to the surface of the imaging bed) until the nose cone slips off its base. To replace a nose cone, press the new cone on to the black nose cone base (Figure 124). To prevent leaks, make sure the new nose cone is fully seated.
 |
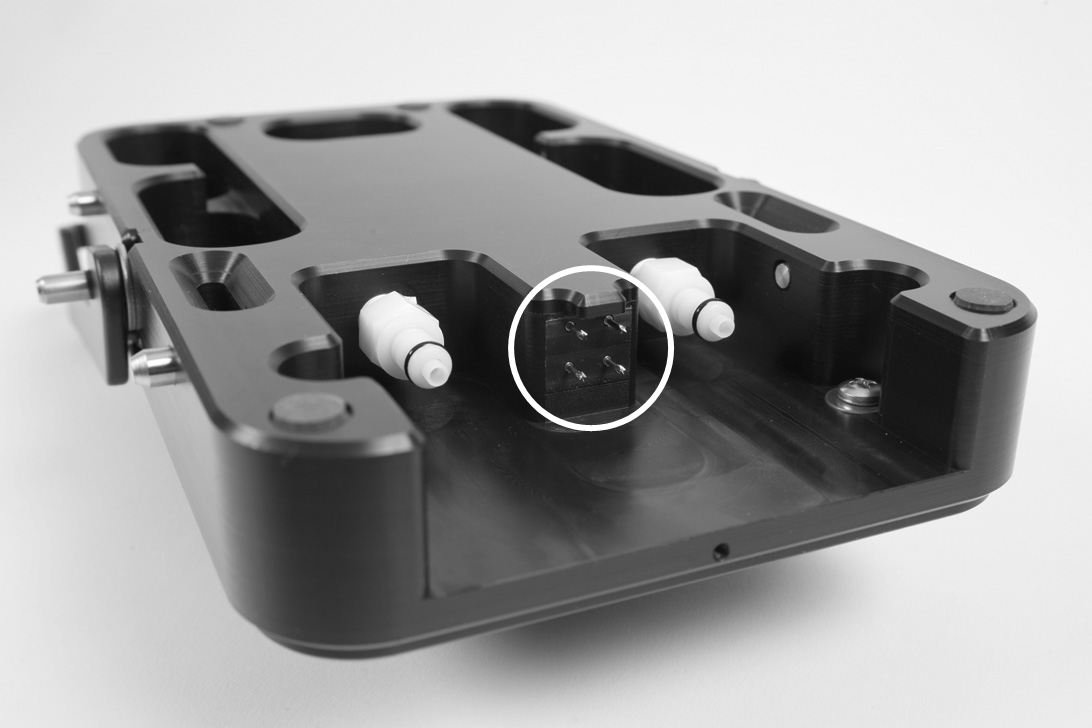
Replacing Heater Plate Contact Pins
Over time, the heater plate contact pins on the bottom of the imaging bed that mate with the imaging drawer (circled below) can become bent and may no longer function as intended. In this event, the temperature in Image Studio™ Software will read “N/A” even if the imaging bed is properly installed. Replacement pins are available in the spare parts kit included with the imaging bed. To replace a pin, use a needle nose pliers to pull out the bent pin and replace with a new pin from the spare parts kit. Press the new pin in to its mount slowly and gently, using the eraser end of a pencil until the visible shoulder on the pin is flush with the receptacle. The pin will “snap” into place.
 |
Desiccant Replacement
The Pearl Imaging System has a cooled CCD camera that uses a desiccant to prevent water condensation on the internal cooled surfaces. Depending on the humidity of the environment, the desiccant in the camera may need to be replaced periodically. Pearl Imaging System's use Image Studio™ Software for image acquisition.
Your imager's acquisition software will provide a warning when the desiccant will soon need to be replaced.
When the internal relative humidity reaches 30%, the software will provide a warning message. When the relative humidity reaches 60%, the cooler will be disabled to prevent condensation.
The desiccant is user-replaceable. If needed, please contact LICORbio for a desiccant replacement kit (9957-046) to perform this task.
Important: Do not remove the new desiccant cartridge from the shipping bottle until ready for installation.
Pearl Imager Installation Instructions
Remove the tray and its contents from the imager prior to any maintenance that requires moving or tilting the imager.
Exit the imager's acquisition software.
Power off the imager by briefly pressing the power button.
Disconnect the power cord.
Disconnect the Ethernet cable.
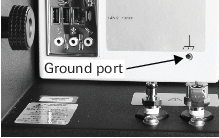
Place the anti-static wrist strap provided in the kit on your wrist and plug the wrist strap cord into the ground port on the back of the imager.
Do not skip this step. The wrist strap ensures that a static spark cannot be discharged from your body into the electronics of the imager.
Use a Phillips screw-driver to loosen the 4 screws on the top panel of the imager. (The screws cannot be removed from the panel.)
For Pearl Imagers, insert the edge from a Standard screwdriver between the top panel and side panel. Be careful not to scratch the paint on the imager.
The brass desiccant cap should now be visible.
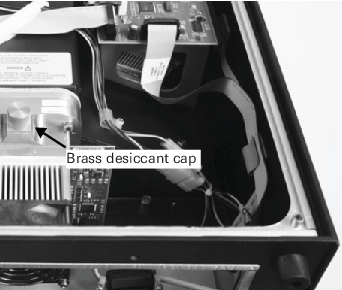
Remove the desiccant cap by turning it counter-clockwise. You can insert a screwdriver in the top of the cap to help loosen the cap.
Discard the old desiccant cartridge.
For Pearl Imagers, remove the new desiccant cartridge from the shipping bottle, and place it into the hole where the old cartridge was removed.
Replace the brass desiccant cap. Turn the cap until it is just seated - do not overtighten.
Replace the imager top panel, and tighten the 4 screws until they are snug. Don't overtighten.
Reconnect the power cord, reconnect the Ethernet cable, and wait 2 hours before starting the imager.
Front Panel Warning Light Indicates an Error
When the Pearl Imaging System is unable to complete a task requested by Image Studio Software, or some hardware failure is encountered, the red error indicator on the Pearl Imaging System front panel (Figure 99. ) flashes and an audible alarm sounds. This error condition is automatically cleared after a few seconds and a message dialog is displayed in Image Studio Software to explain the error. The error message will instruct the user on any further required actions.
Resetting the Instrument
In the event that the instrument becomes unresponsive, reset the instrument by holding down the front panel power button (Figure 99. ) for at least 5 seconds until the instrument turns off. This procedure cuts power to the instrument and should only be used when communication cannot be re-established by any other means. The Pearl Imager should resume normal operation after the power button is pressed again to turn the instrument back on, though start up may take several minutes.