Operation
Operation
Overview
Operation Summary
- Open the imaging drawer and clean the imaging bed.
- Turn on the heater plate using Image Studio™ Software. Wait 2 minutes for the temperature to reach the set point and warm the imaging bed.
- Make sure the nose cone plug is in place, check the rotameter setting (0.5 liter/min., typical), and start the anesthesia gas. Allow 1 min. to prime the system with isoflurane gas.
- Move the mouse from the induction chamber to the imaging bed, remove the nose cone plug, and slide the muzzle of the mouse into the nose cone. Close the imaging drawer.
- Image the mouse using Image Studio software and return the mouse to its cage or recovery chamber.
WARNING: Isoflurane gas can leak in the amount supplied to the Pearl Imager if the product is not used properly. Carefully follow the instructions in Chapter 3 to ensure that the exhaust port is connected to a charcoal filter and that the animals are properly fitted into the nose cones.
AVERTISSEMENT:
L'anesthésie d'isoflurane peut fuir dans la quantité fournie à Pearl si le produit n'est pas employé correctement. Suivez soigneusement les instructions dans ce chapitre pour vous assurer que le port d'échappement est relié à un filtre à charbon, que le système d'anesthésie fourni par l'utilisateur est correctement relié, et que le cone de nez est équipé d'un bouchon inséré.
Setting the Heater Plate Temperature
The heater plate in the imaging bed is controlled by Image Studio™ Software. The heater plate control is located in the instrument toolbar. Make sure the imaging bed is dry, if recently cleaned, then click On to turn the heater plate on. The temperature will be briefly displayed as “n/a” and then will change to the actual temperature as the temperature changes. If the temperature is continuously displayed as “n/a”, the imaging bed is not mounted correctly in the Pearl Imager. See System Overview for instructions on locking the imaging bed in place.
The temperature is usually set near the internal temperature of the mouse to minimize heat loss during anesthesia. The set point range is 32-42 °C, in increments of 1 °C. The temperature set point is changed by clicking and dragging the temperature slider. The heater plate generally reaches the set point temperature in approximately 2 minutes.
Starting the Anesthesia Gas
IMPORTANT: Follow Local/State and Federal Regulations for isoflurane gas use.
Mice can be anesthetized either with injectable or inhalation anesthesia. Only inhalation anesthesia is discussed in this section. The Pearl Imager is designed for operation with isoflurane gas. Mice should be induced in an induction chamber containing an atmosphere of oxygen plus approximately 2% isoflurane.
NOTE: Level of isoflurane will vary from 0-5%.
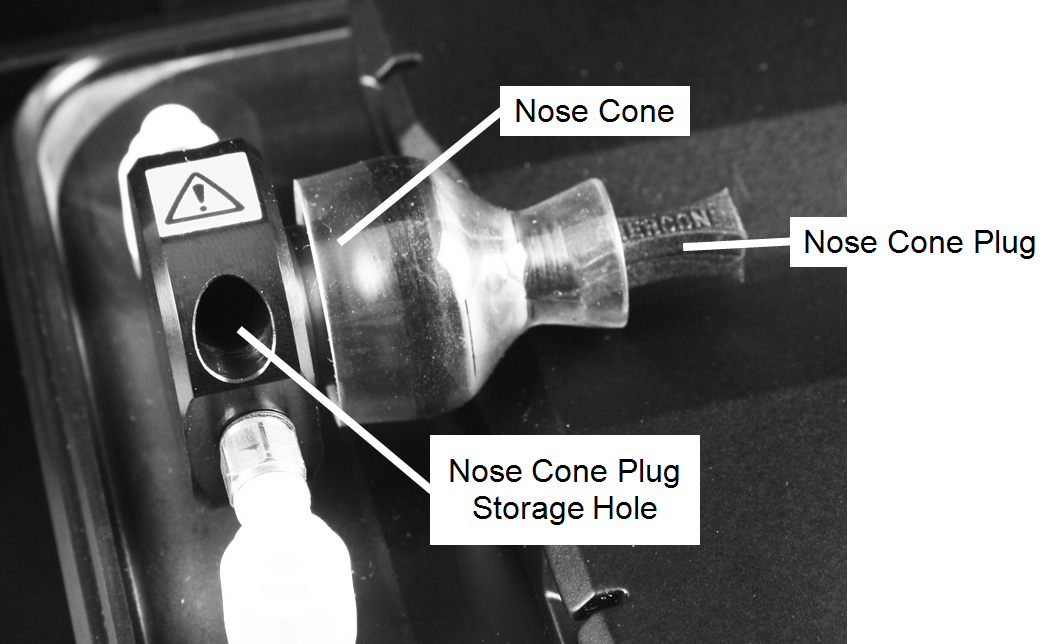
WARNING: Make sure a black nose cone plug is tightly inserted in the nose cone before turning on the anesthesia gas. Failure to insert a nose cone plug will result in the release of isoflurane gas.
AVERTISSEMENT:
Assurez-vous qu'un bouchon noir pour cone de nez est bien inséré dans chacun des cones de nez avant de brancher le gaz anesthésiant. L'absence de bouchon peut provoquer une décharge de gas
|
|
|
Follow the instructions from the manufacturer of the anesthesia system to anesthetize mice. Typical flow rates for the Pearl Imager are 0.5 liters per minute. Use the rotameter adjustment knob on the Pearl rotameter to set the flow rate to 0.5 liters per minute. Allow about a minute to prime the Pearl Imager with isoflurane gas.
WARNING: Isoflurane gas is a human inhalation hazard that needs to be ventilated away from workers. It can cause coughing, sore throat, dizziness, drowsiness, headache, and unconsciousness. Pregnant women should not work in an environment where there is any potential isoflurane risk.
AVERTISSEMENT:
Le gaz isoflurane est un danger pour le système respiratoire humain et il doit être dispersé par ventilation. Il peut provoquer toux, mal de gorge, étourdissement, somnolence, mal de tête et perte de conscience. Les femmes enceintes ne devraient pas travailler dans un environnement où il existe un danger d'inhalation d'isoflurane.
CAUTION: To prevent pressure build up in the external anesthesia system, don’t close the rotameter on the Pearl instrument unless the anesthesia system is properly vented.
AVERTISSEMENT:
Pour empêcher l'accumulation de pression dans le système externe d'anesthésie, ne fermez pas le rotamètre sur l'instrument Pearl à moins que le système d'anesthésie soit correctement aéré.
Placing Mice on the Imaging Bed
When using gas anesthesia, mice should be anesthetized in an induction chamber before placement on the Pearl® Imaging System bed. Wait until the isoflurane gas is flowing and you are ready to acquire an image with Image Studio™ Software before moving a mouse to the imaging bed.
IMPORTANT: Anesthesia gas will not flow to the nose cone unless the imaging bed is locked in place (see System Overview). If the imaging bed is not locked in place the heater plate temperature will read “n/a” as described above.
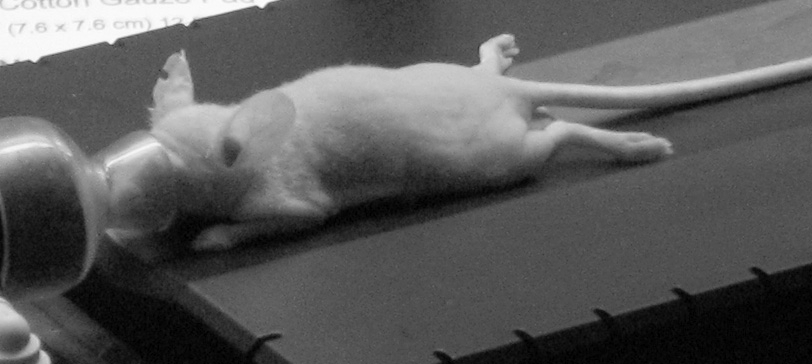
Retrieve a mouse from the induction chamber and remove any bedding material or debris on the mouse. Open the Pearl Imager drawer, quickly remove the nose cone plug, and slide the muzzle of the animal into the nose cone.
|
|
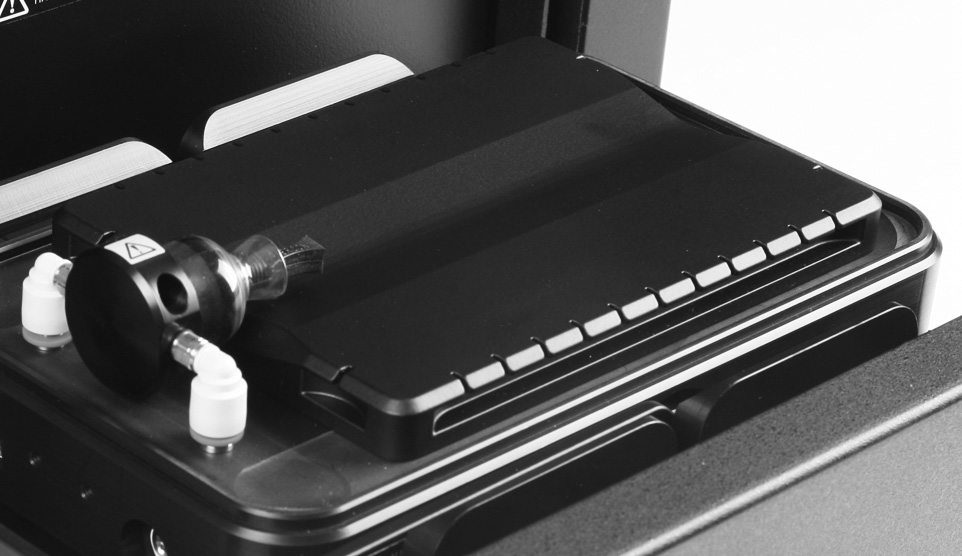
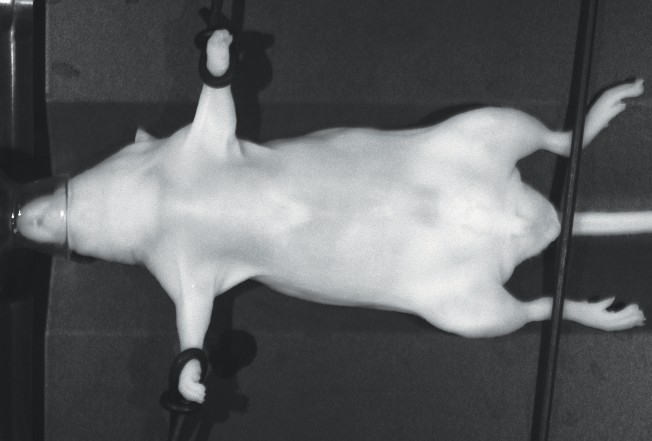
Place the mouse on its side, back, or belly, such that the tumor or organs of interest are oriented as close as possible to the upper surface of the mouse as it lays (see Using Restraints). The nose cone plug can be stored in its storage hole next to the nose cone (Figure 126. ). Once the mouse is in place, push the drawer button to close the drawer.
WARNING: Observe the tail of the mouse before closing the imaging drawer and make certain the tail will not be pinched between the drawer and instrument housing when the drawer closes. The drawer is specially designed to stop if resistance due to human fingers is detected, but a more delicate mouse tail may not be detected.
AVERTISSEMENT:
Observez la queue de la souris avant fermeture le tiroir d'image. Assurez-vous la queue ne sera pas pincé entre le tiroir et le logement d'instrument quand le tiroir se ferme. Le tiroir est particulièrement conçu pour s'arrêter si la résistance due aux doigts humains est détectée, mais une queue plus sensible de souris ne peut être détectée.
Image Studio software can now be used to generate images of the animal. After completing image acquisition, open the imaging drawer, remove the mouse, reinstall the nose cone plug, and return the mouse to a recovery chamber or cage.
At the end of the imaging session, turn off the vaporizer using the manufacturer’s instructions.
Using Restraints
Occasionally, you may need to move limbs or other body parts out of the way in order to get the best view of the region of interest. Stretchable neoprene restraints can be found in the imaging bed spare parts kit. These restraints can be secured using the anchor slots along the edge of the imaging bed (Figure 128).
Restraints can simply be placed across the animal, or a loop method can be employed to secure individual limbs. To use the loop method, start by making a loop at one end of the neoprene restraint and slip the loop through one of the o-rings included in the imaging bed spare parts kit. Slip the loop over the animal’s limb and slide the o-ring toward the limb until the loop tightens gently around the limb.
IMPORTANT: Take care to exert the minimum amount of force required to restrain the animal to avoid injury. Be careful not to overtighten restraints to avoid cutting off circulation.
Using a Mouse Blanket
The spare parts kit for the Pearl Imager contains a package of black mouse blankets that can be laid over any part of the mouse to mask it during imaging. For example, if you try to inject a probe in the tail vein and miss the vein, the tail will be very bright relative to the rest of the mouse when imaged. A better image will be produced if a mouse blanket is laid on top of the tail to cover the bright area before imaging.
IMPORTANT: The mouse blanket should always be placed with the shiny side up. Whenever possible use a restraint to hold the mouse blanket in place. Unrestrained, the mouse blanket can move, or even fall into the Pearl Imager when the imaging drawer opens and closes.
Imaging Tips
Hair vs. Shaved Animal
If working with a haired mouse model (i.e., something other than nude mice), shave the animal in the region of interest prior to imaging. Up to 50% of the signal is blocked when imaging through hair. Hair removal can be accomplished by shaving (i.e., mustache shavers work well) or by the use of Nair® hair remover.
Diet Considerations
Background levels in the abdominal region can be significantly lowered by considering what diet to feed mice before imaging. The application note entitled “In Vivo Animal Imaging Diet Considerations”, included with the Pearl Application Protocols Manual, illustrates why purified diets are an excellent choice for near-infrared optical imaging. Approximately 4 days are necessary to clear fluorescence from the abdominal region when switching mice from a regular diet to a purified diet. The application note also discusses lower cost alternative diets and their effectiveness in background reduction.
Mouse Recovery Procedure
If a mouse wakes up during imaging, the design of the imaging drawer makes it difficult for the mouse to escape the drawer. If the imaging drawer is closed when you discover the mouse has awakened, press the power button to turn off the Pearl® Imaging System and slowly open the imaging drawer manually by pulling on the drawer handle. If the mouse is still in the imaging drawer, the mouse should be easy to capture.
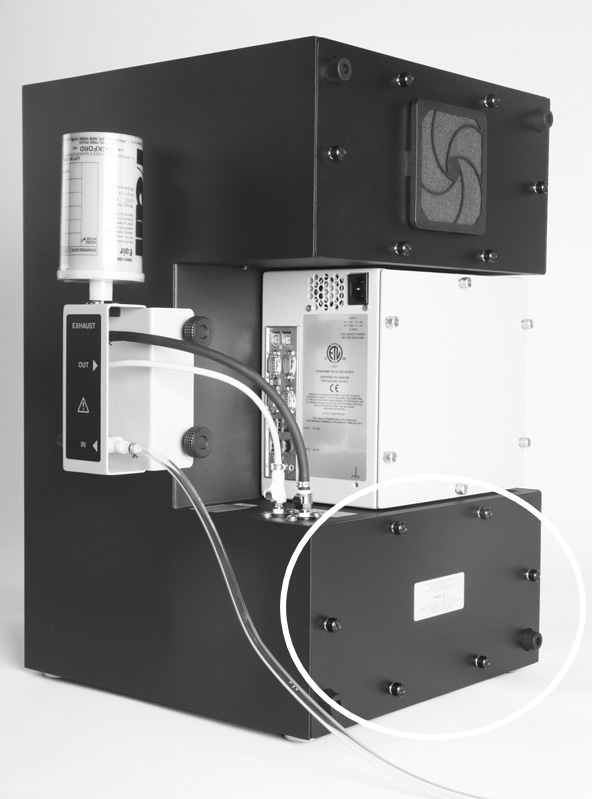
If the imaging drawer is open and the mouse is not present, the mouse has escaped into the Pearl Imaging System instrument enclosure. The lower rear access panel can be removed to retrieve the mouse using the procedure described below.
Procedure:
- Place the nose cone plug in the imaging bed nose cone to stop anesthesia gas from escaping through the nose cone. Alternately, gas flow can be stopped from the external anesthesia system or by removing the imaging bed.
- With the imaging drawer open, briefly press the power button on the Pearl Imaging System front panel and wait for the instrument to turn off (if not already powered off).
- Disconnect the power cord from rear of the instrument.
-
CAUTION: Do not remove the lower rear panel before the power is turned off and the power cord is disconnected.
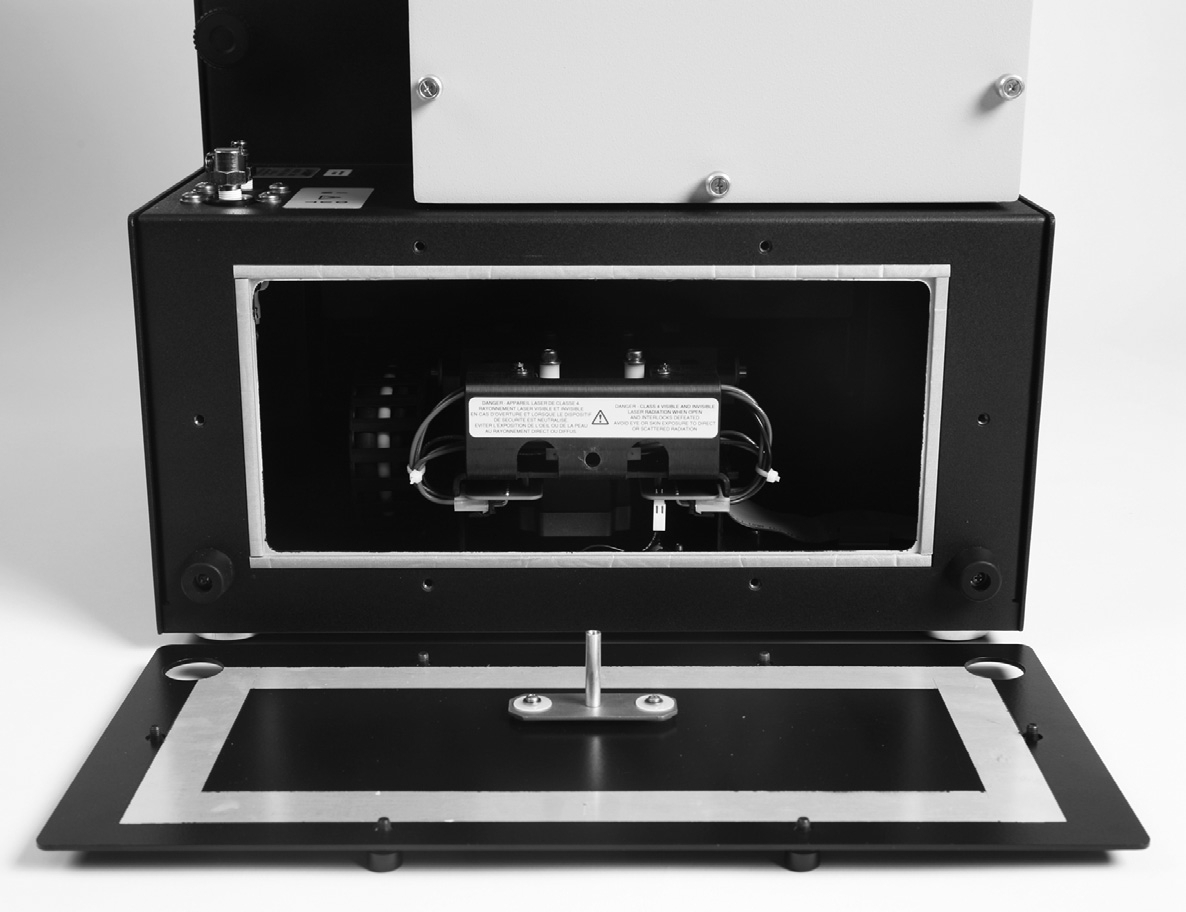
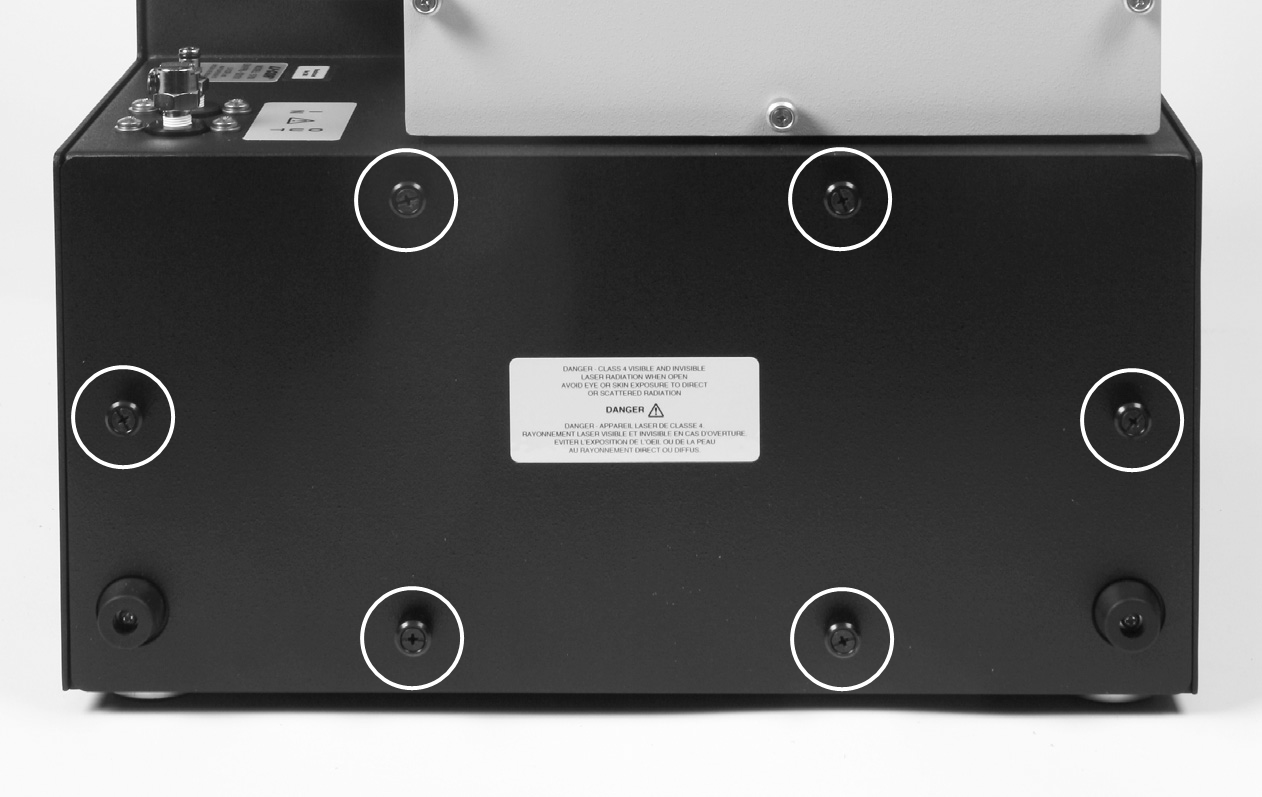
- The lower rear access panel is held in place by six screws (Figure 130) that are permanently attached to the panel. Use a screwdriver to loosen all six screws, then pull the access panel straight back and off the instrument (Figure 131).
- Locate the mouse. If the mouse is not visible immediately, look upward on the left and right sides to see if the mouse has climbed upward and is sitting on one of the ledges formed by the enclosure. Use a flashlight if necessary.
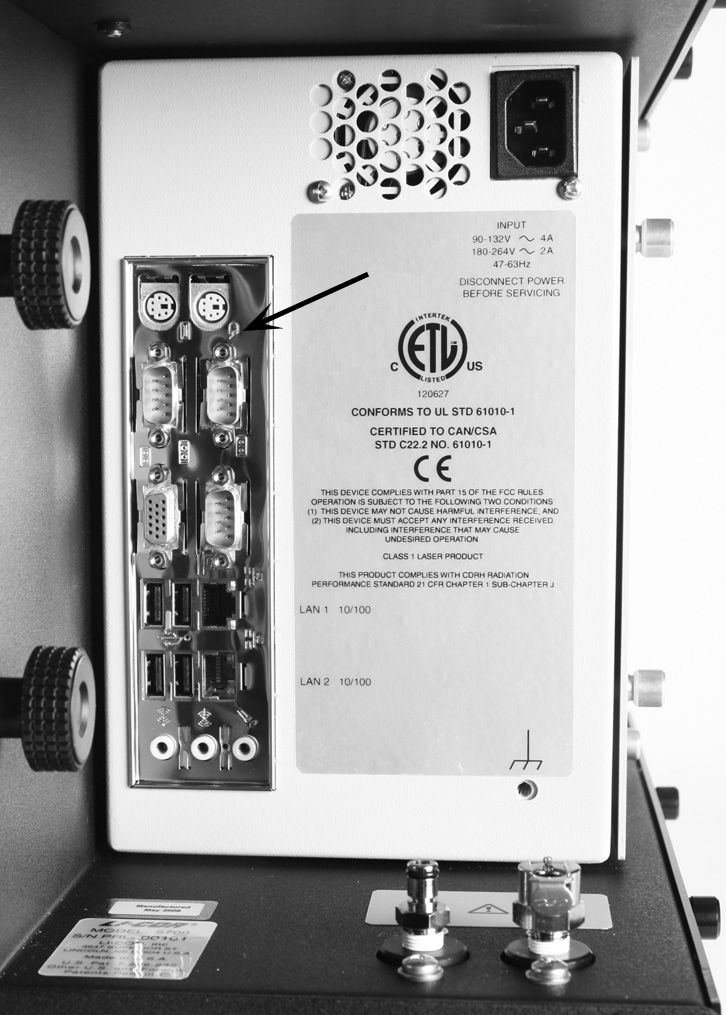
- Before reaching inside the instrument, touch the chrome connector panel (Figure 132) to discharge any static electricity. To reduce the chance of static discharge, do not wear rubber gloves while attempting to remove the mouse, and, whenever possible, keep one hand on the chrome connector panel to maintain a connection to chassis ground.
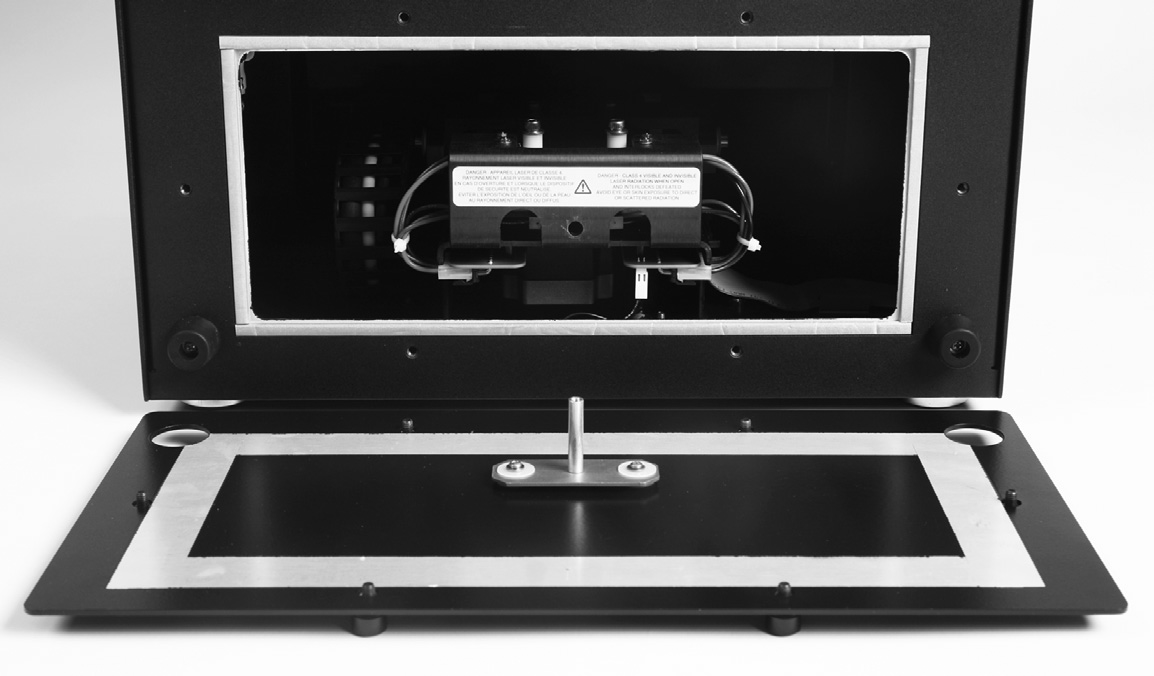
- Reach into the instrument on the left or right side and recover the mouse. Avoid touching the electronics in the center of the instrument. Take care not to pinch your fingers in the mechanical components of the drawer (i.e. do not move the drawer while hands are inside the enclosure).
- Align the center post of the rear access panel with the alignment hole (Figure 133) and replace the access panel. Start all screws by hand prior to tightening with tools. Tighten all six screws.
- Reconnect the power cable, turn the instrument on, and resume normal operation.
