C‑DiGit Blot Scanner Maintenance and Troubleshooting
Maintenance & Troubleshooting
Maintenance
The C‑DiGit Blot Scanner requires only minimal maintenance. However, as with any equipment utilizing electrical power, there is a danger of fire or electrical shock if the equipment is not properly maintained.
Disconnect power before servicing. LI‑COR Biosciences recommends that you routinely inspect the system. The following are some general maintenance guidelines:
- Clean the exterior case parts with warm water and a damp cloth.
- Clean the scanning surface with 100% methanol, then water.
- CAUTION: DO NOT use acetone to clean the imaging surface.
- Wipe all chemical spills from the case and scanning surface to prevent damage to the surface coating.
- Keep the scanning surface free of harsh solvents and and other combustibles. Dry thoroughly before use.
- Inspect all cables and power cords for evidence of fraying, exposed wire, or loose connections.
- Do not allow sample or sample covering to extend past the imaging surface. This can prevent the instrument from operating properly by allowing light to enter the scan area.
Troubleshooting –Hardware Problems
System Requirements
The C‑DiGit Blot Scanner and Image Studio will run on Windows 7, 8 and 8.1, or on Mac OS 10.9 or 10.10.
Cannot Connect to C‑DiGit Blot Scanner
- Install the Image Studio Software before you try to connect the USB or Ethernet cable to the C‑DiGit Blot Scanner.
- If the Image Studio software does not automatically connect to the C‑DiGit Blot Scanner, manually connect by clicking the Image Studio Application button, and choose Instrument->Connect.
In the event that the C‑DiGit Blot Scanner is unable to connect to a computer, your IT department may need to make specific configurations active on the computer for communication to occur.
The C‑DiGit Blot Scanner requires a network based connection between the instrument and the computer. The C‑DiGit Blot Scanner uses IPv4 and IPv6 Link-
Local Addressing to automatically create an IP network without any user configuration or additional servers. For this addressing to occur properly, the following settings must be configured:
- Port 50000 must be open (Windows 7, 8, and 8.1).
- Communication port 50000 is utilized as the default port for the UPnP (Universal Plug and Play) protocol. This service is noted to hold this network port consistently open, listening for devices that support the technology. This port simplifies intelligent device connection to network environments. The network port 50000 makes it possible for devices physically connected to a single machine to be shared with other clients under the same network.
- Port 5353 needs to be left open. This is required for Bonjour, mDNSResponder to auto discover instrument.
- Firewall should not block any part of Image Studio or the Java software platform that is installed with Image Studio.
- Firewall should not block port 50000.
- IPv6 must be enabled (Windows 7, 8, and 8.1).
USB Cabling Problems
If you are experiencing problems connecting to the C‑DiGit Blot Scanner using the USB cable, note the following:
- The Image Studio installer for C‑DiGit includes the required USB RNDIS driver.
- Image Studio must be installed on Windows before the USB cable is connected between the C‑DiGit and the computer.
- After the Image Studio installation is complete, connect the USB cable between the PC and the instrument and power on the instrument. There should be a system notification that new hardware is found. Depending upon the system, this notification may take place immediately when the cable is plugged in or it may be a few minutes later.
- During the Windows new hardware installation, the system may give the user a choice between discovering drivers on the internet or from the local installation. If the computer is connected to the internet, pick the selection that looks for drivers on the internet. If the computer is not on the internet you may need to specify the location. If the drivers are not found automatically, choose ‘Install from a list or specific location’, and navigate to the <Program Files\Licor\Image Studio Digits\driver> folder.
- After installing the driver, start Image Studio and attempt to connect.
Front Panel Warning Light Indicates an Error
When the C‑DiGit Blot Scanner is unable to complete a task requested by Image Studio Application Software, or a hardware failure is encountered, the red error indicator on the C‑DiGit front panel (Figure 140. ) flashes and an audible alarm sounds. This error condition is automatically cleared after a few seconds and a message is displayed in the Image Studio Application Software status bar at the bottom of the main window (below) to explain the error. Click on the button to open the Status Message History dialog to view all diagnostic records.

The error message will instruct the user on any further required action.
Resetting the Instrument
In the event that the C‑DiGit Blot Scanner becomes unresponsive, reset the instrument by switching the rear power switch off for a few seconds, then back on. This procedure cuts power to the instrument and should only be used when communication cannot be re-established by any other means. The C‑DiGit Blot Scanner should resume normal operation after start up but may take several minutes.
Troubleshooting –Chemistry Problems
High background can be caused by a variety of sources, including washing methods, secondary antibody concentration, and substrate choice. Background can be reduced by altering these sources.
High Background Due to Substrate
Pools of excess substrate on the membrane can lead to areas of high background, as can adding more substrate to a membrane that has dried. Apply the substrate carefully and wick off any pools of substrate before imaging. Do not allow the membrane to dry.
| 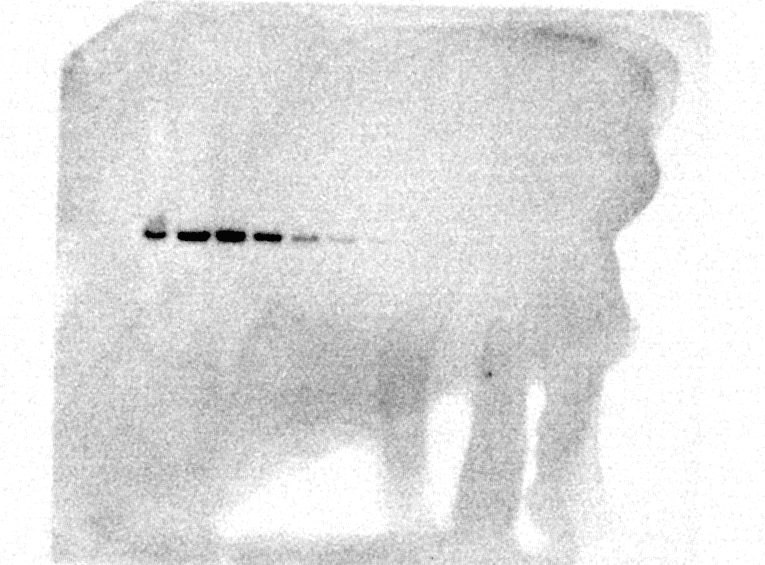 |
B. Substrate Addition to Dried Blot |
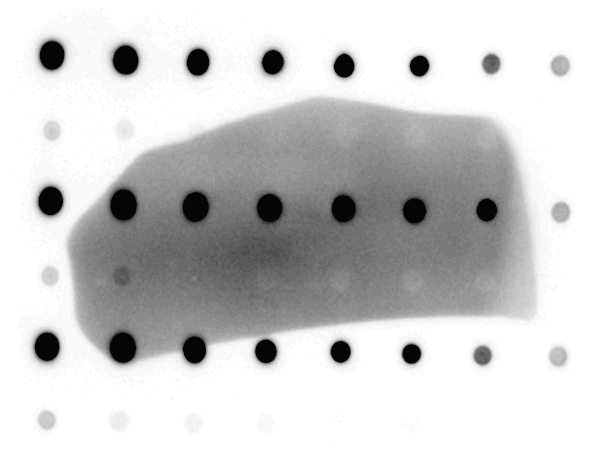
High Background from Wrapping the Blot in Plastic Wrap
Blots can be imaged directly on the C‑DiGit Blot Scanner without wrapping in plastic wrap. In general, the membrane should not dry out in the amount of time it takes to complete a scan. However, to maintain moisture on the membrane for an extended amount of time, you can place a clear, flat plastic covering on top of the chemiluminescent Western blot to keep the substrate in contact with the HRP enzyme and to prevent the blot from drying out. It will also minimize pooling of the substrate.
Image the plastic covering by itself first to determine if it scatters light, causing high background. You may need to try several types of plastic coverings before finding the best one.
Wrapping the blot in plastic wrap may cause unwanted background, especially if it is folded or handled roughly. When using plastic wrap it is important to avoid wrinkles, as they scatter light, resulting in high background. In addition, try to avoid leaving fingerprints from pressing on the blot.
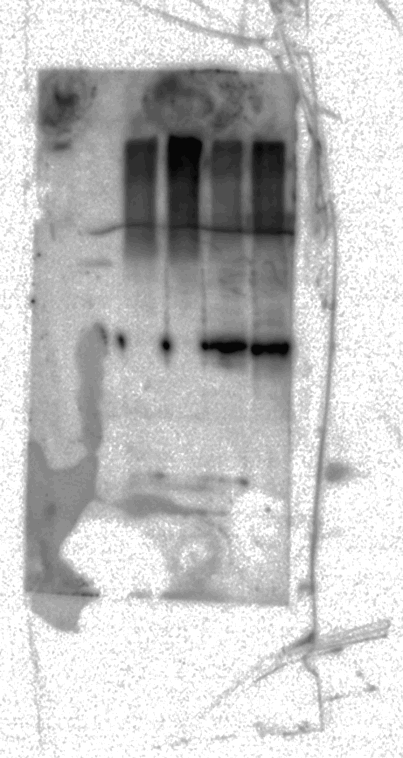
Low Signal
The C‑DiGit Blot Scanner should be set to High Sensitivity to generate the highest signal. Chemiluminescent substrates vary in quality and effectiveness. If your images show up as all black or all white, you can try using fresh substrate or a more sensitive substrate to improve signal. Varying the primary and secondary antibody dilutions may also affect the signal and background of a blot.
Be sure to incubate the blot in substrate for a full 5 minutes before imaging. The incubation time does not include the 6 minutes of acquisition time, so do not add substrate and then scan immediately.
If you have tried all these steps and you are still getting faint signal, you can try scanning the Target image to verify that your C‑DiGit is functioning properly (see Getting Started).
Frequently Asked Questions
Q: Why does my image show up as all black or all white?
A: This means that signal is too faint or weak to detect. You can try using a different substrate or fresh substrate may be needed. Allow the blot to incubate for a full 5 minutes before setting it in the C‑DiGit to scan.
Q: What image resolution can I export?
A: Image Studio can export images at resolutions up to 600 dpi in TIF, JPG, and PNG format.
Q: Why doesn’t my image import into Image Studio?
A: Image Studio supports TIFF, JPG and PNG files. These file formats come in numerous forms. If your TIFF, JPG or PNG file does not import, please send the image to LI‑COR so that future updates will be compatible with your image file format.
Q: Why is there a cyan color (grayscale image) or a bright white color (color image) on my image in Image Studio?
A: The signal is saturated in these areas.
Q: Can I add additional keys to Image Studio for C‑DiGit?
A: Yes. For expanded functionality, optional application keys are available. Please visit www.licor.com/AnalysisKeys or ask your sales representative for more information.
Q: Can I use marker lanes in my gel analysis in Image Studio for C‑DiGit?
A: Yes, but you will need to purchase and import the In-Cell Western Analysis Key (Image Studio Lite/C-DiGit), P/N 2000-521.
Q: Will Image Studio for C‑DiGit work on Windows 8?
A: Yes. Image Studio 5.x for C‑DiGit is currently supported on Windows 8.0, 8.1, and 8.1 update 2 (also known as 8.2).
Q: When I try to connect to the C‑DiGit Scanner, I see a list of multiple instruments. How do I know which one to choose?
A: If there are multiple C‑DiGit Blot Scanners connected, you will have to choose the desired C‑DiGit Blot Scanner from a list of available instruments listed by serial number. You can find the serial number on a label on the underside of the instrument.