Routine Maintenance and Cleaning
Routine Maintenance
CAUTION: Remove the tray and its contents from the instrument prior to any maintenance that requires moving or tilting the instrument.
The Odyssey XF Imager requires only minimal maintenance. However, as with any equipment utilizing electrical voltages, there is a danger of fire or electrical shock if the equipment is not properly maintained. Disconnect power before servicing. Routinely inspect all cables and power cords for evidence of fraying, exposed wire, or loose connections.
Clean Imager
Clean the exterior case parts with warm water and a damp cloth.
Wipe away all spills.
Keep the imaging drawer dry. If necessary, the imaging drawer can be cleaned with a wipe dampened with methanol.
Clean Tray
Trays may be discarded after use. Trays should be discarded if they are damaged or if an unacceptable level of residual signal remains after cleaning.
The following procedure may allow you to clean the tray sufficiently for reuse. If you choose to reuse the tray, it should be cleaned before and after each use.
Remove sample from tray.
Always handle membranes with forceps.
Clean tray with water and wipe with a lint-free wipe.
Do not use blue wipes.
Rinse with 70% ethanol or 70% isopropanol and lint-free wipes. Methanol may be used if necessary.
Do not use acetone or any other harsh solvents to clean the imaging tray.
Cleaning the Fan Filter
CAUTION: Remove the tray and its contents from the instrument prior to any maintenance that requires moving or tilting the instrument.
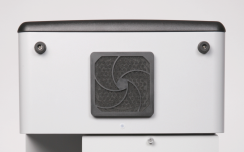
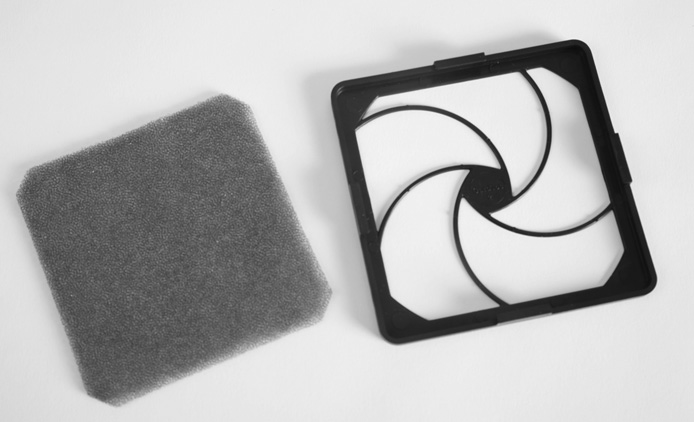
The air intake fan on the back of the Odyssey® XF Imager is used to cool the internal electronics. Periodically inspect the air intake filter (Figure 83). Clean or replace the filter when it looks like dust is starting to block air flow. To test air flow, place a piece of standard printer paper over the filter while the instrument is running. Release the paper. If the paper falls away, rather than being held to the air intake by suction, the filter is significantly blocked.
The back cover snaps off for access to the foam filter. The filter can generally be rinsed out, dried, and replaced if it is only clogged with dust.
 | |
 | |
Desiccant Replacement
The Odyssey XF Imager has a cooled CCD camera that uses a desiccant to prevent water condensation on the internal cooled surfaces. Depending on the humidity of the environment, the desiccant in the camera may need to be replaced periodically.
Your imager's acquisition software will provide a warning when the desiccant will soon need to be replaced.
When the internal relative humidity reaches 30%, the software will provide a warning message. When the relative humidity reaches 60%, the cooler will be disabled to prevent condensation.
The desiccant is user-replaceable. If needed, please contact LICORbio for a desiccant replacement kit (9957-046) to perform this task.
Important: Do not remove the new desiccant cartridge from the shipping bottle until ready for installation.
Desiccant Replacement Instructions
Remove the tray and its contents from the imager prior to any maintenance that requires moving or tilting the imager.
Exit the imager's acquisition software.
Power off the imager by briefly pressing the power button.
Disconnect the power cord.
Disconnect the Ethernet cable.
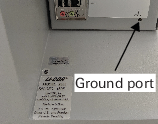
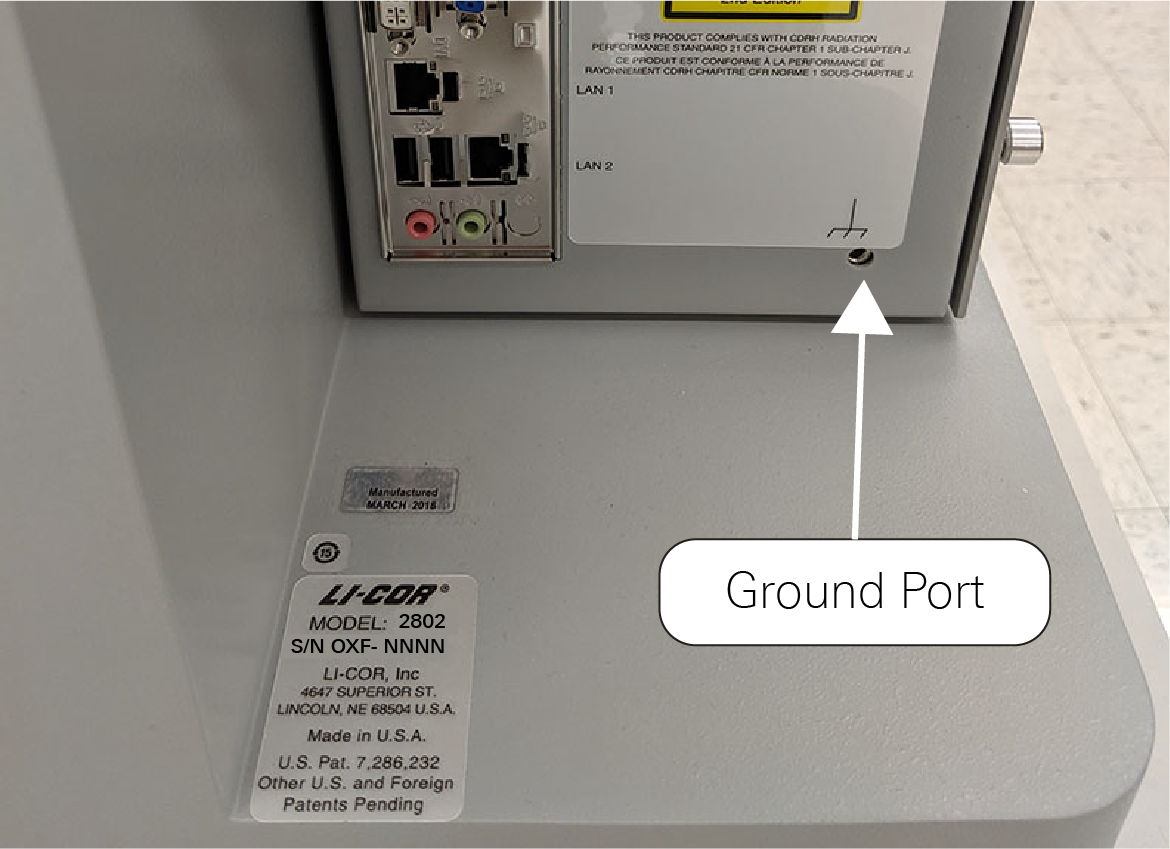
Place the anti-static wrist strap provided in the kit on your wrist and plug the wrist strap cord into the ground port on the back of the imager.
Do not skip this step. The wrist strap ensures that a static spark cannot be discharged from your body into the electronics of the imager.
Use a Phillips screw-driver to loosen the 4 screws on the top panel of the imager. (The screws cannot be removed from the panel.)
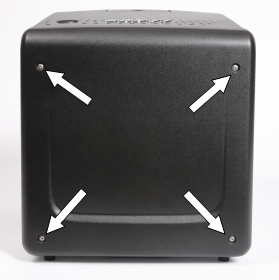
Lift the black plastic cover.
The brass desiccant cap should now be visible.
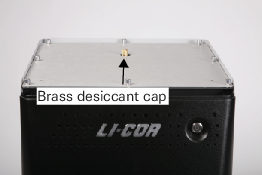
Remove the desiccant cap by turning it counter-clockwise. You can insert a screwdriver in the top of the cap to help loosen the cap.
Discard the old desiccant cartridge.
Remove the new desiccant cartridge from the shipping bottle. Place the new desiccant into the cap and slightly rotate it back-and-forth to engage the hook-and-loop fasteners.
Replace the brass desiccant cap. Turn the cap until it is just seated - do not overtighten.
Replace the imager top panel, and tighten the 4 screws until they are snug. Don't overtighten.
Reconnect the power cord, reconnect the Ethernet cable, and wait 2 hours before starting the imager.
Starting the Imager
Wait 2 hours before starting the imager to allow time for the air inside the camera to dry.