Luminescence-Based Multiwell Plate Assays
Experimental Considerations
Take the following factors and information into consideration when planning your experiment.
Plate Type
Clear bottom plates are required for all plate-based assays on the Odyssey M. For luminescent assays, either black walled or white walled plates can be used, however, black walled plates will reduce scatter from adjacent wells. White walled plates are phosphorescent, and may cause increased background in control wells. If using white plates, keep the plates in the dark as much as possible before imaging.
| Opaque White Plate | Clear-Bottom White Plate | Clear-Bottom Black Plate |
 |  |  |
Number of Plates to Image
One plate is imaged at a time on the Odyssey M, in Position 1 (upper left designated corner), for luminescent plate assays.
Plate Seals
Using a plate seal (AbsorbMax, Millipore Sigma Z722537-50EA) on a black walled plate will reduce signal crosstalk, especially when the signal spans multiple orders of magnitude. This is noted most often when using recombinant luciferase proteins as a positive control.
Detection
The Odyssey M images luminescent signal using the Chemiluminescence detection channel. Luminescent signals are detected from 500-800 nm and are not spectrally separated. Detection of dual luminescent reporters can be achieved by sequentially adding substrate along with appropriate quenching reagents.
Blank Wells
Add assay reagents to wells without cells. They will be used as background wells in the analysis.
System Compatibility
Select luciferase reporter enzyme (e.g. firefly, Renilla, and bacterial luciferases) and substrate with lifetimes that are stable for a minimum of 30 minutes. Luciferase reagents with longer lifetimes, for example glow assays, are well suited for the Odyssey M. Rapid kinetic assays are not suitable for detection on the Odyssey M. Several companies sell both flash and glow assays, and this information is stated in the product information. Several companies offer comparative information regarding their luminescence assays to guide these considerations, including:
Goldbio: Luciferase Assay Kit Comparison Guide
Promega: Choosing a Luciferase Reporter Assay: a comparison guide
Read Times
Read times of from 5 seconds to 60 minutes per plate can be performed once the substrate has been added to the plate and equilibrated.
Dual Detection Assays
For assays that use both fluorescent and luminescence detection, confirm that the excitation and emission of fluorescence component is compatible with the Odyssey M. Image the fluorescent detection prior to adding substrate for the luminescence detection. This will ensure that the fluorescent detection is not compromised.
Required Materials
- Odyssey M Imager (Model 3350)
- LI‑COR Acquisition Software
- Empiria Studio® Software
- Plates, clear bottom, black preferred
- Plate seals (e.g. AbsorbMax, Millipore Sigma Z722537-50EA)
- Other materials required for your plate-based luminescence assay*
*If you are using a kit, follow the manufacturer's instructions.
Odyssey M and LI‑COR Acquisition Software Set-up
With the Odyssey M connected to your computer, launch the LI‑COR Acquisition Software.
- Place the plate alignment grid on the Odyssey M scan bed.
- Apply a black plate seal to the plate.
- Place the plate on the alignment grid in position 1 (upper left).
- On the Choose Assay page, select Custom.
- From the drop-down menu, set the Assay to Other.
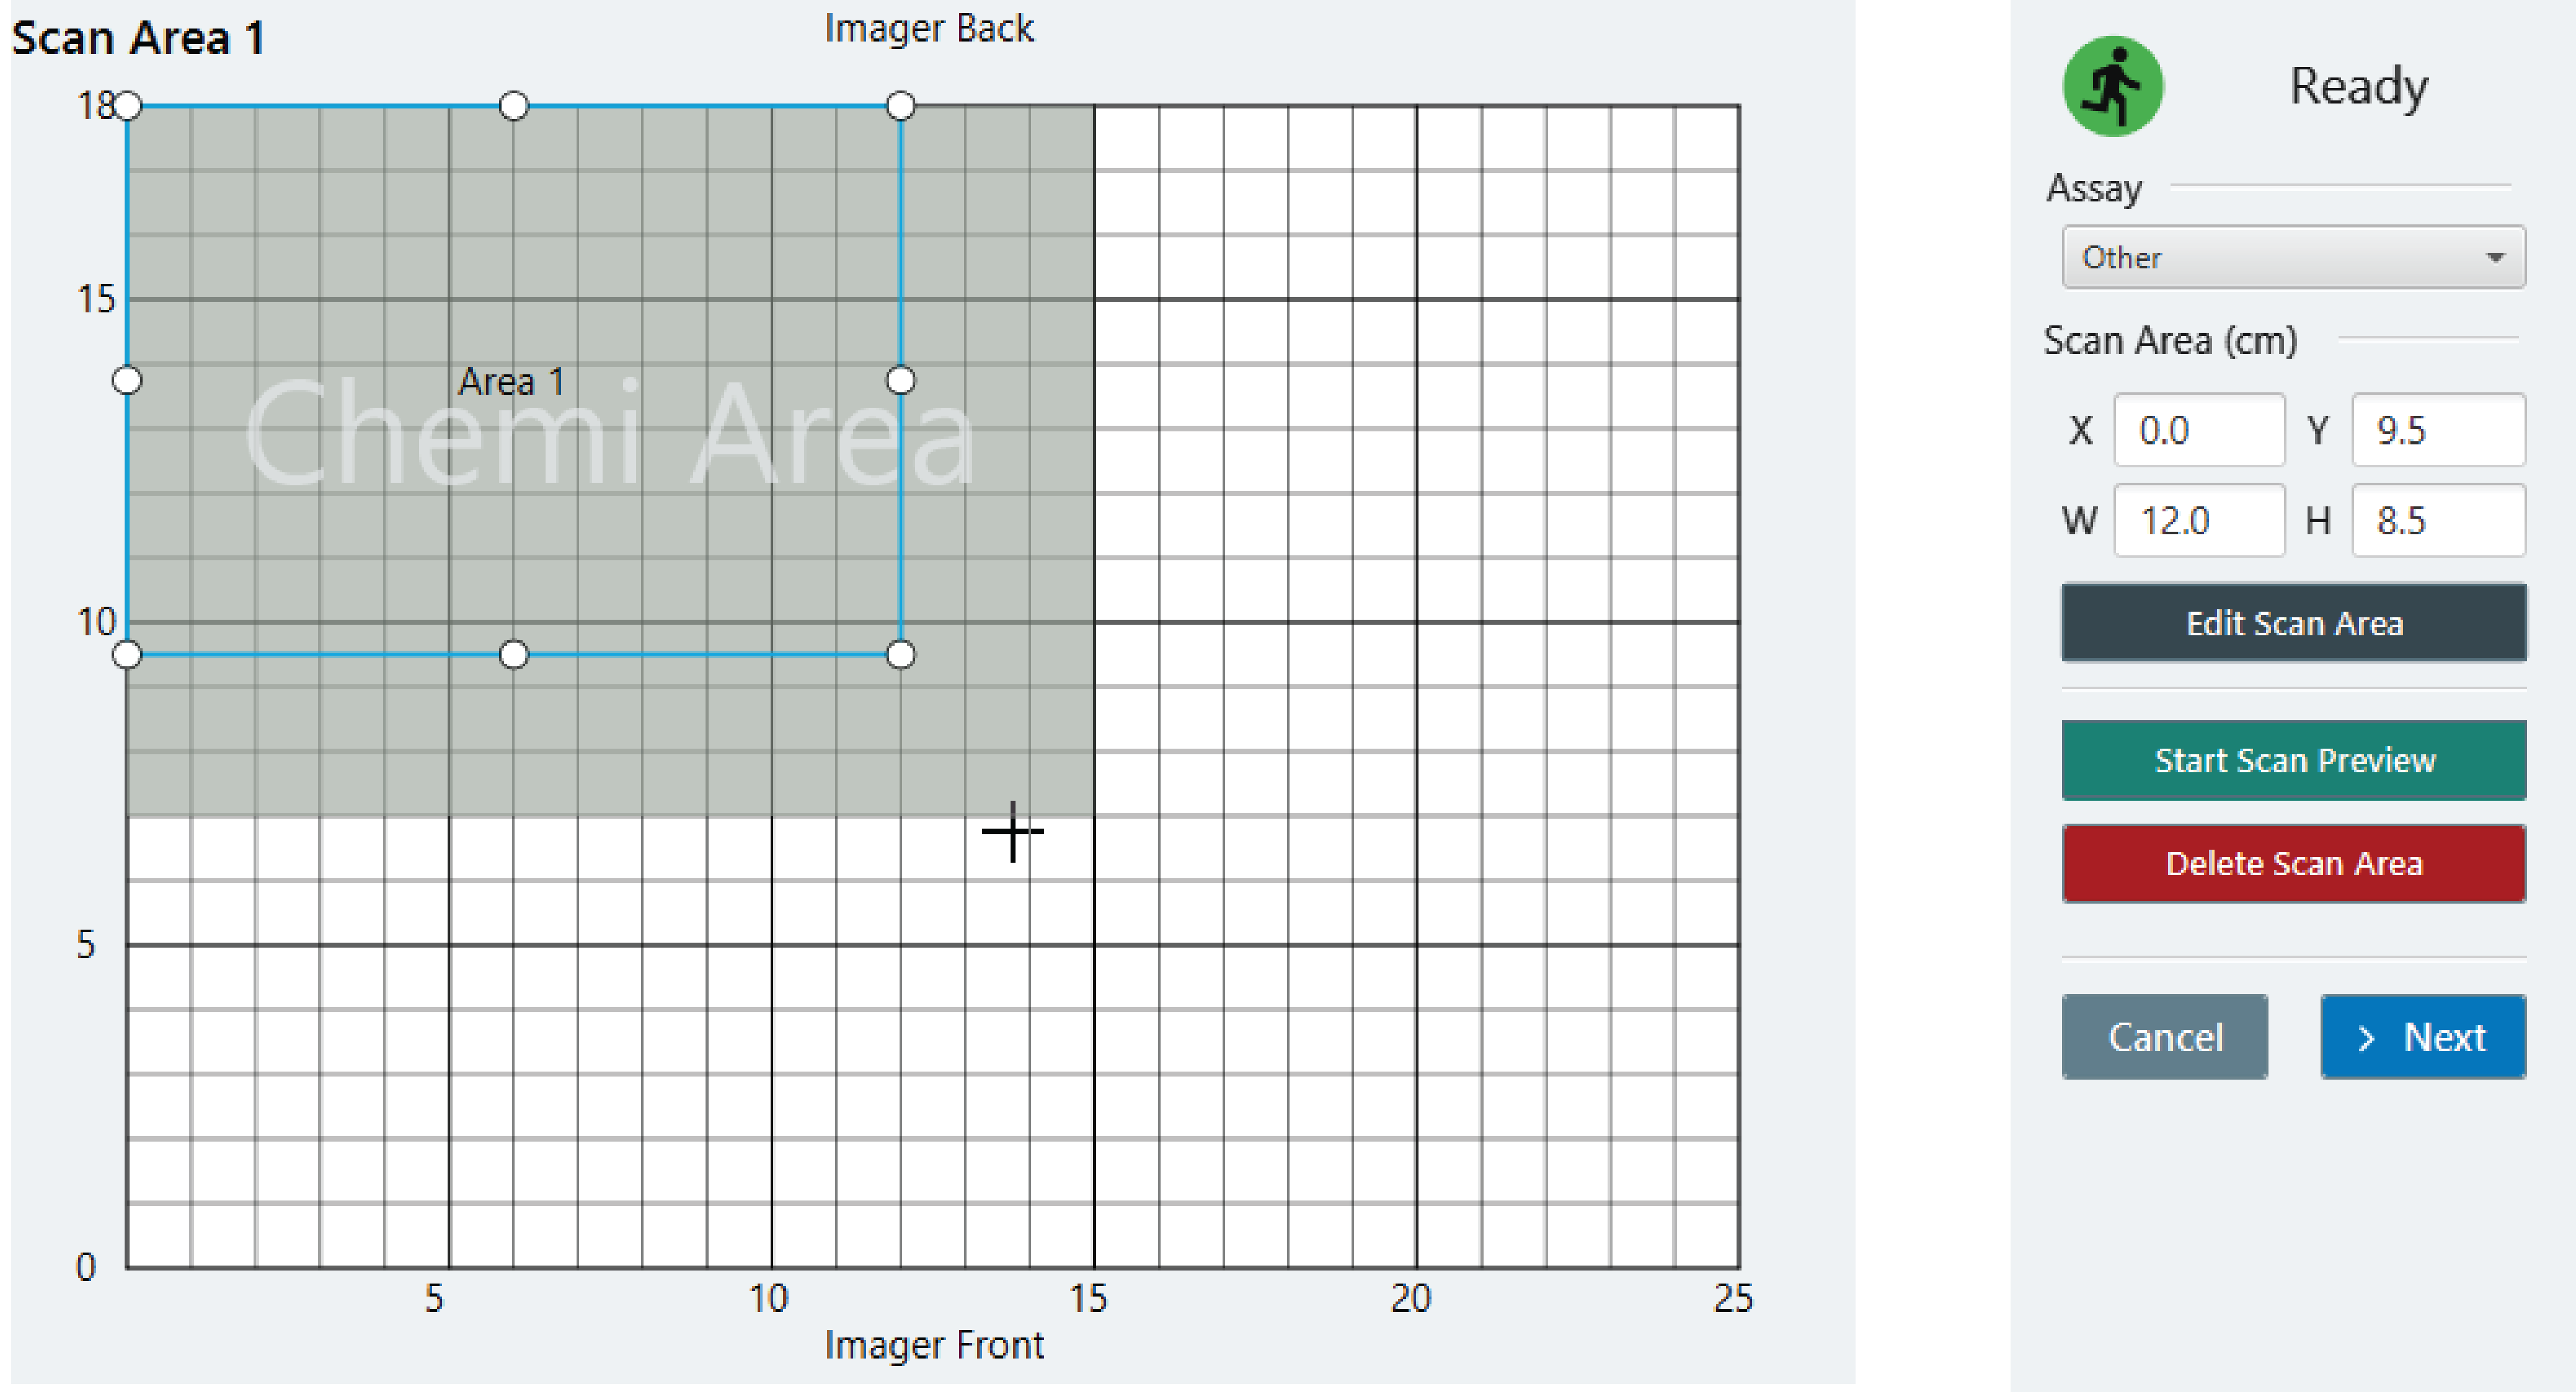
Select the Scan Area to draw a box with dimensions 12 wide by 8.5 high and position it at x=0.0 and y=9.5.

- Click Next.
- For scan area 1, use the following settings:
- Focus Offset: Set to zero. Luminescence detection is not sensitive to the focus offset setting.
- Resolution: 100 µm
Acquisition Time: a minimum of 2 minutes is recommended for the best sensitivity. See System Compatibility.
If an acquisition time of shorter than 30 seconds is needed, select Acquisition time in Detection Options. However, we have seen reduced performance with scan times of less than 2 minutes.
- Click Scan.
- When the scan is completed, click Leave.
- Open Image Gallery and double-click on the Chemi image that was acquired.
- Select Flip or Rotate from the Edit Acquisition page.
- Choose the image that shows the plate Flipped Top to Bottom and select Save as New.
- Click Done.
- Export the image using from the Image Gallery. This will export an Acquisition Zip File that can be imported into Empiria Studio® Software.
Luminescence Plate-Based Assay Analysis in Empiria Studio® Software
To analyze a luminescent plate-based assay in Empiria Studio, following the instructions in this section.
Import the Acquisition Zip File for Analysis
Launch Empiria Studio® Software.
Select Image Gallery.
Select Import LI-COR Zip Files, and import the .zip file you exported from LI‑COR Acquisition Software.
Create Plate Template
If you already have a Plate Template that can be used to analyze your luminescence plate image, you can skip to the Analyze Plate.
On the Empiria Studio Home screen, select Template Library & Experiment Designer.
Select Create Template.
On the Add Template Details screen, enter the following information.
Enter a name for the Plate Template.
In the Assay list, choose Cell Analysis. When the Category options appear, choose Target Analysis.
Select the appropriate well format using the drop-down. Click Next.
Under Set up Wells, click Next until you are at Set Samples. Highlight all wells and select Set as Sample. Provide a Name for the sample wells. Click Next.
At Set Well Groups. Select All Wells. Click Next.
On the Review page, review the template, then select Done.
Analyze Plate
If you do not have a Plate Template that can be used for luminescence assay analysis, see Create Plate Template before following these steps.
On the Empiria Studio Home page, click Projects.
You can use an existing Project or create a new one.
Select Create New Experiment.
Select Multiwell Plate.
Select Cell Analysis.
Select Target Analysis.
Click Image Gallery, and select the image Acquisition you want to analyze.
Click Start.
Name the analysis and add a short description (optional). Click Next.
On the Select Template page, click Select. Select the Plate Template you want to use, then click Next.
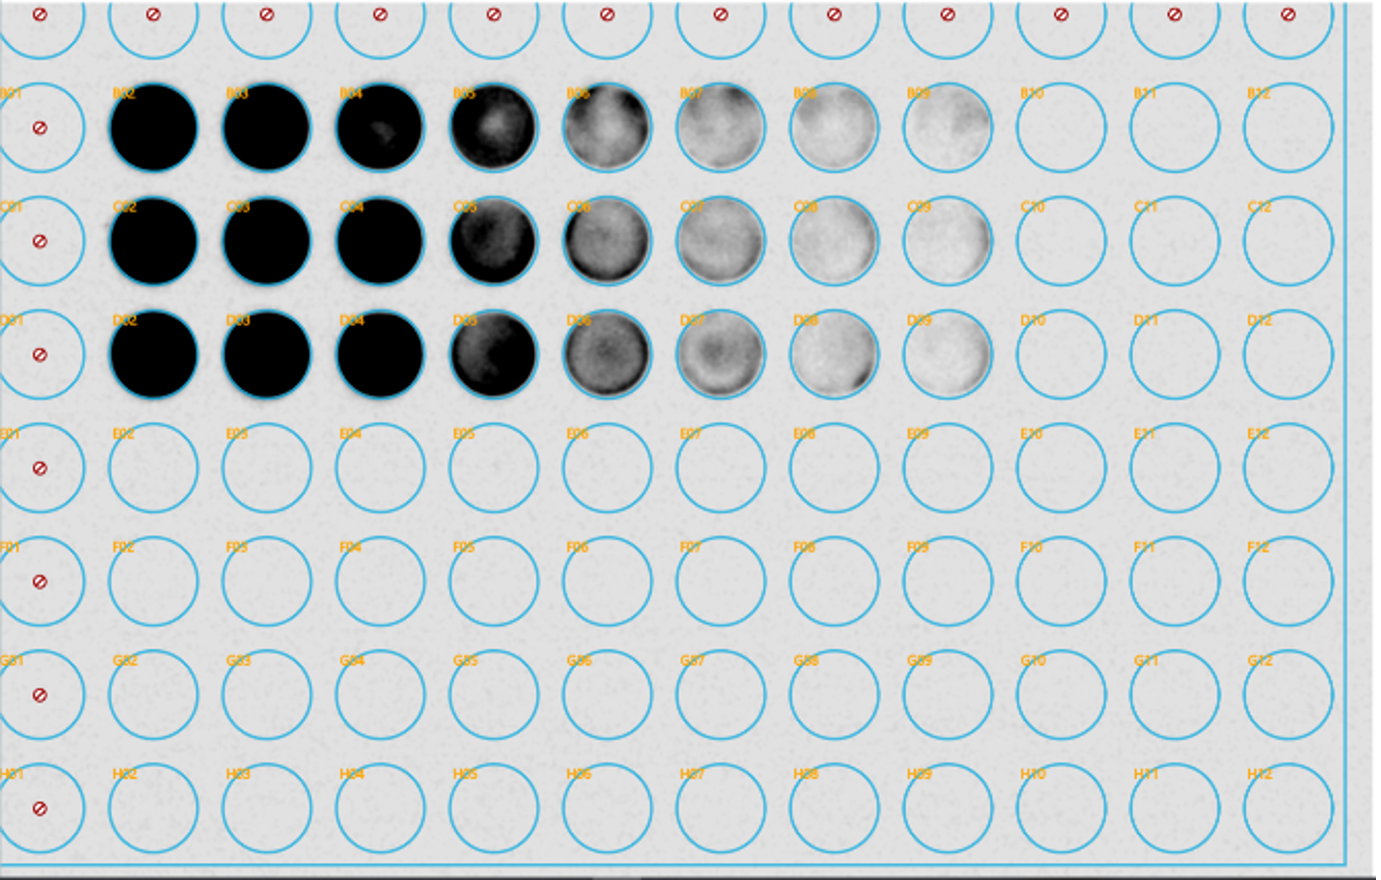
Click the edge of the plate boundary to move the plate map to the appropriate position. Adjust the well size, if necessary, to encompass the well.
White Plate Black Plate 

Open the Analysis table. Click export to export the data. Name and save the file.