Work Area
If you are using Image Studio 21 CFR Part 11, please Work Areas in Image Studio 21 CFR Part 11.
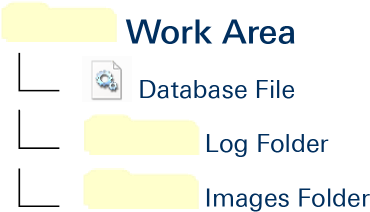
Work Area: A folder used to store images, analysis data, software settings, and log files. The following are contents of a Work Area:
- Database file: Contains analysis data and software settings.
- Log Folder: Contains log files of Image Studio Software operations.
- Images Folder: Contains images from acquisitions taken in the current Work Area and images imported into the Work Area.
How to Create and Use Work Areas to Facilitate Data Management
Follow this procedure, starting with Before Launching Image Studio Software, to create Work Areas.
Before Launching Image Studio Software:
To create Work Areas in a way that will facilitate data management, determine if multiple users will be sharing the same computer account to run Image Studio Software .
If multiple people or multiple labs will be sharing the same computer account to run Image Studio Software, create an Overall folder on a local drive where each lab member using the system can create their own Work Area or each lab can create a Lab Folder. Each group member will create an individual Work Area in the appropriate Lab Folder.
Efficient way to organize Work Area folders when multiple lab groups will be using the same computer account.
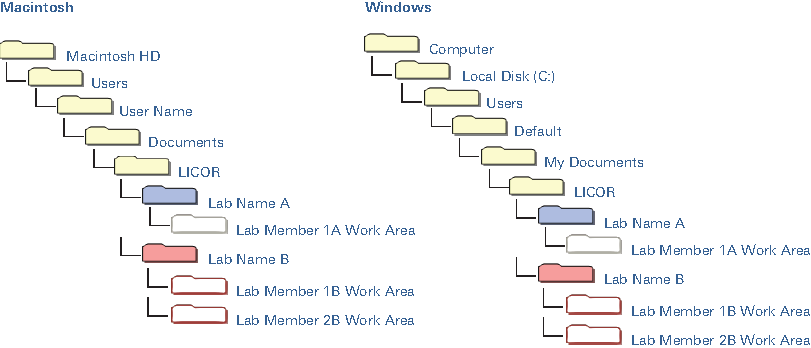
If each Image Studio Software user has an individual account on the computer, create an Overall folder on each account to save each individual's Work Area.
Procedure for Creating a Work Area
-
Double click the Image Studio Software icon
 to start Image Studio Software.
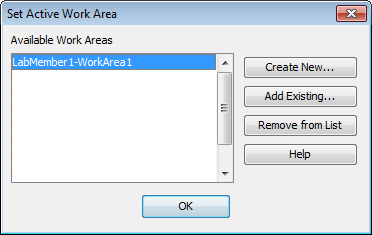
The Set Active Work Area dialog will open.
 If Image Studio Software is already open...
-
Click the Image Studio Application button
 .
.The Application menu will open.
-
In the Application menu, point to Work Area and click Switch.
The Set Active Work Area dialog will open.

-
-
In the Set Active Work Area dialog, click Create New...
The Create New Work Area dialog will open.
- In the Create New Work Area dialog box:
- Type a name for the Work Area in the Name field.
Click Browse and navigate to the appropriate folder where the Work Area should be created.
Avoid Creating a Work Area on a Network Drive...Avoid creating Work Areas on a network drive. Image Studio™ Software uses a Work Areas to save data while scanning, so a scan may be aborted if the connection to the network drive is not fast enough.
If data must be transferred to a network drive, flash drive, or cloud based system, export the image and data to a Zip File. Exporting Zip Files and Copying Data to Another Work Area for how to export Zip Files.Click Save.
Image Studio™ Software will open with the newly created Work Area as the active directory for saving new scans and analyses.
Use the following procedure to add a Work Area to the list of Work Areas in the Set Active Work Area dialog if:
- A Work Area was removed using the Remove from List option and needs to be added back to the list.
- A Work Area was moved or renamed using the operating system's file manager. The Work Area in its new location or with its new name will need to be added using the Add Existing... option.
Procedure to Add Existing Work Areas
-
Click the Image Studio™ Software Application button, point to Work Area, and click Switch (or just open Image Studio™ Software).
The Set Active Work Area dialog box will open.

-
Click Add Existing...
The Select an existing Work Area Folder dialog box will open.
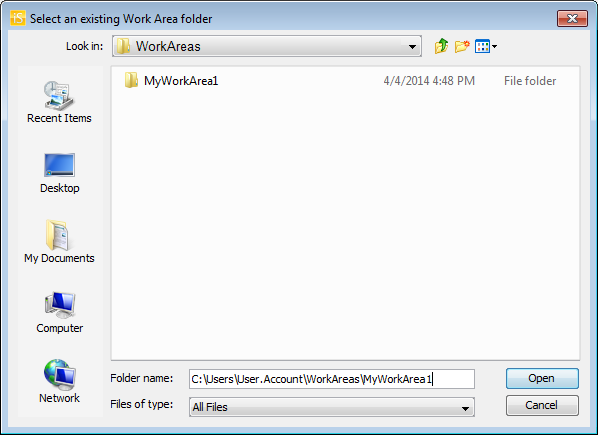
- In the Select an existing Work Area Folder dialog, browse to the Work Area that needs to be added.
- Click once to select the Work Area to be added.
- Click Open and the Work Area will be added to the list in the Set Active Work Area dialog box.
- Click OK in the Select Active Work Area dialog box and Image Studio™ Software will open with the newly added Work Area as the active directory for saving new scans and analyses.
Unused Work Areas can be removed from the list of Work Areas in the Set Active Work Area dialog box without deleting any data.
-
Click the Image Studio Application button, point to Work Area, and click Switch (or just open Image Studio™ Software).
The Set Active Work Area dialog box will open.

- Scroll to find the Work Area to be removed, and click once to highlight it.
- Click Remove from List.
-
The Confirm Work Area Removed dialog box will open.

- Click Yes to remove the Work Area.
Settings can be imported from a different Work Area into the current Work Area. Settings in the current Work Area will be overwritten.
To import Work Area settings:
- Click the Image Studio Application button
 .
. - In the Image Studio Application menu, point to Work Area and click Import Settings.
- In the Import Work Area Settings dialog, select the Work Area with the correct settings to be imported.
- Click Import.
Most settings will be imported from the chosen Work Area and will overwrite settings in the current Work Area. For example, the imported settings include:
- Custom added protein markers (i.e. ones that have been entered manually)
- Work Area preferences located in the Preferences dialog
- Show shape options in the Show group
- Image display options
- Table settings for all tables including which columns are displayed and how the table is sorted
- Instrument settings including scan presets (such as scan resolution, scan quality, and focus offset) and other options on the Acquire tab
- Custom grid, grid array, plate, and plate array templates
- Custom Lab Book templates
- Custom chart templates
Best Practices for Getting the Most from a Work Area
Under most circumstances, Work Areas and Acquisition Folders should not be renamed, moved, or have files from outside Image Studio Software saved to them. If Work Areas or Acquisition Folders are renamed or moved, Image Studio™ Software will not recognize them.
If a Work Area has been renamed or moved, the Work Area will need to be added back to the list in the Set Active Work Area dialog.
- A user may choose to create more than one Work Area to separate different projects, or if one Work Area is so full that it takes too long to open.
- When dealing with projects that require different settings and analysis types, keeping a Work Area for each project may be expedient, because Image Studio will recall the last used settings specific to each project when that project's Work Area is opened.
The most common reason for this is trying to create a Work Area within another Work Area (nesting Work Areas). Starting with Image Studio™ Software version 3.1, nested Work Areas can no longer be created to prevent potential data loss.
Solving the Nested Work Area Problem
If nested Work Areas were created in previous versions of Image Studio™ Software, use the following procedure so Work Areas can be created again.
-
Using the operating system's file manager, create a higher level folder where the nested Work Areas can be stored at the same level in the folder structure (as shown below).
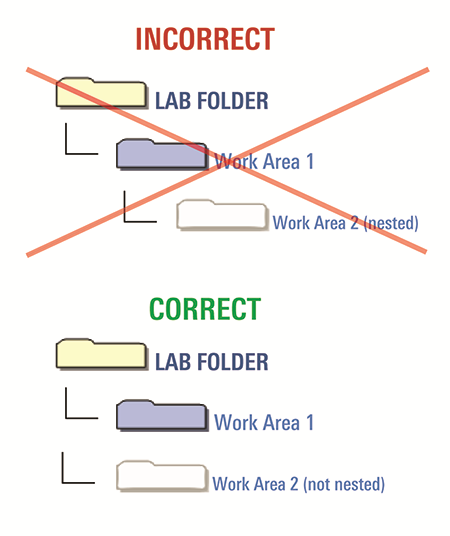
- After the Work Areas have been moved to the higher level folder, they will need to be reassigned as Work Areas in Image Studio™ Software.
- Reassign the Work Areas by clicking the Add Existing... option in the Set Active Work Area dialog box and choosing the Work Area in its new location. Adding Work Areas Back to the List... for more information.
- Remove unused Work Areas from the list.
Maintaining a single user per Work Area provides an orderly system for file management and saves time by allowing Image Studio™ Software to automatically load the last used settings and analysis tools. Custom scan presets, views, and protein markers that are not standard in Image Studio™ Software settings will need to be entered and saved manually in each new Work Area.
File Management
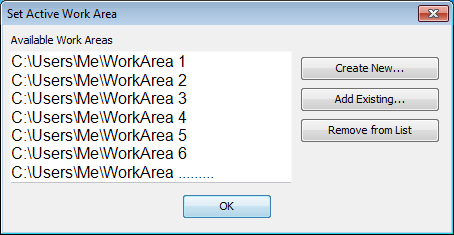
Having too many Work Areas can make it difficult to remember which Work Area contains the files of interest. Multiple Work Areas are also inconvenient because the dialog for selecting the active Work Area may contain many entries, and scrolling through the list can be difficult.
Too many Work Areas can make scrolling through the Set Active Work Area dialog difficult.
Sort and View Advantages
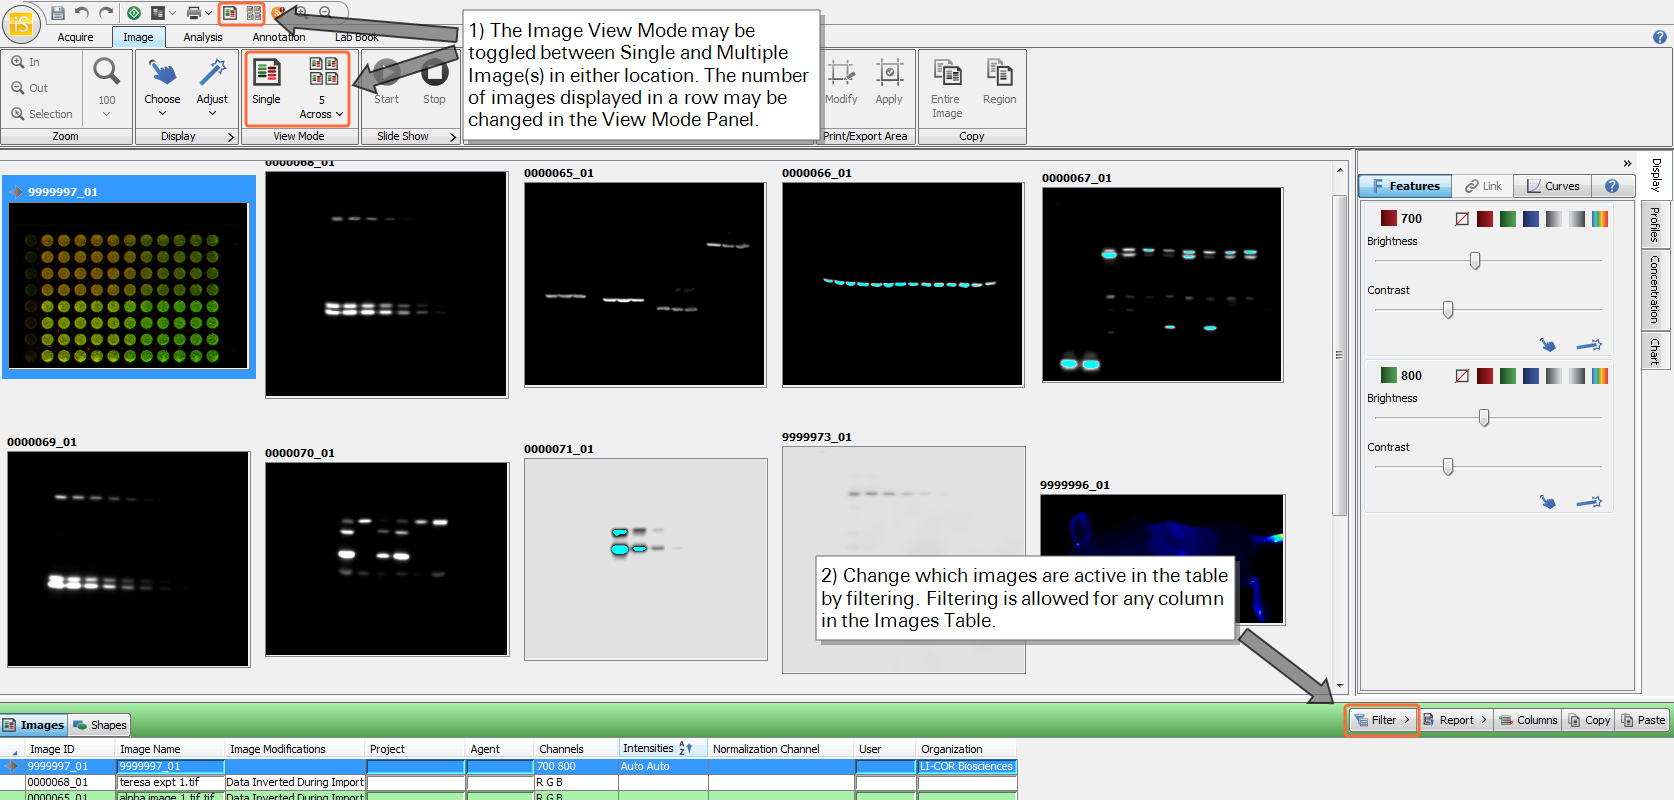
In addition to cleaner file organization, leaving all of one's user data in a single Work Area takes advantage of the Image Studio™ Software tools for viewing and filtering files. Image Studio™ Software can display thumbnails of all images when the Multiple Images button is selected. Although a large number of images may be present in the Images table, these images are easily managed using the Image Studio™ Software Filter function.
View the location of the Image View Mode and File menu options:
