Insect respiration chamber
Printable PDF: Insect respiration chamber
(6800_InstallGuide_Insect_Chamber_16478.pdf)
Download this content as a pdf that can be saved to your computer or printed.
See Removing a chamber to detach a currently-installed chamber.
Installing the chamber
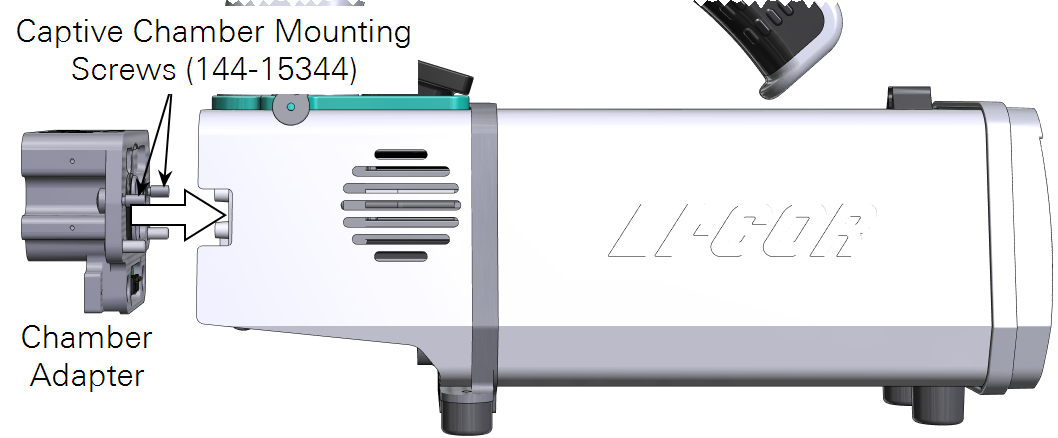
- Install the chamber adapter.

- Tighten the screws snugly—until they are tight and then just a little bit more.
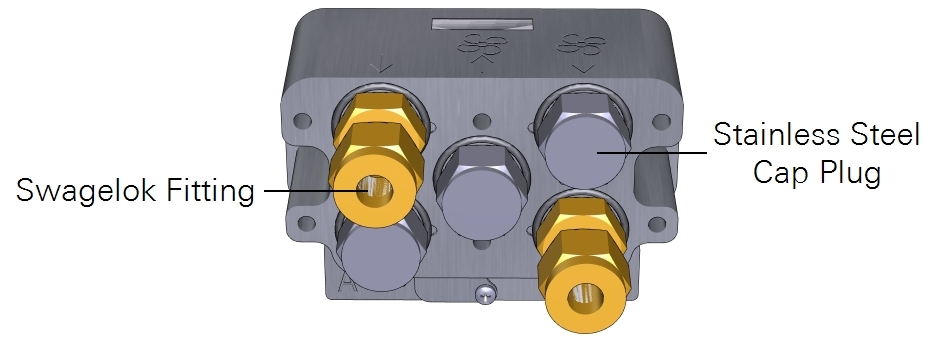
- Install the three stainless steel caps and two Swagelok fittings onto the chamber adapter.

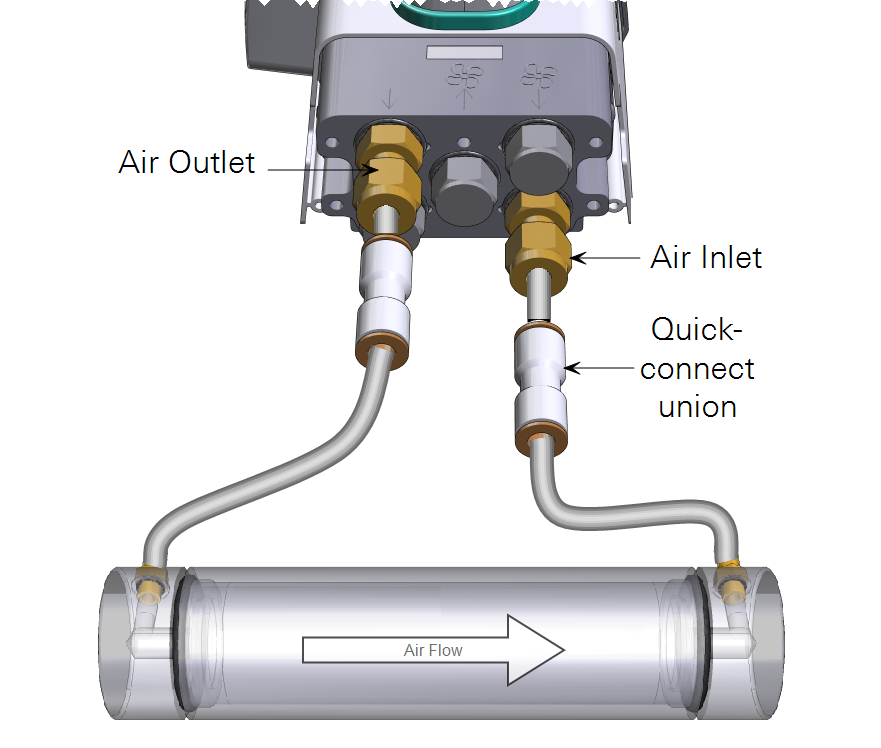
- Cut two pieces of hose, each about 5 to 10 cm long. Remove the brass nuts on the air inlet and air outlet. Remove the brass ferrules and set them aside. Install a set of vinyl ferrules on each hose, as shown.

- Install the hoses between the chamber and the head, as shown.

- Verify that the chamber is recognized under Constants > System Constants.
- Run the Chamber Leak Test under Start Up > Warmup/System Tests. Correct any issues indicated by the test.
- Reinstall the connector cover.
Making a basic measurement
- Set the Environment controls:
- Flow: Set Flow: On; Pump speed: Auto; Flow rate: 400 µmol s-1 or your desired flow rate; Press Valve: 0.0 kPa
- H2O: Set H2O: On; RH_air: 50%
- CO2: Set CO2 injector: On; Soda Lime: Scrub Auto; Tap CO2_r and enter a setpoint of 400 µmol mol‑1. If you are expecting large fluctuations in gas exchange, e.g., human breath cycles, it is best to control on CO2_r. One of CO2_r or CO2_s should always be stable when you make measurements.
- Fan: Set Mixing fan: Off
- Temperatures: Check the temperatures to see their current values
- Load the chamber.
- Disconnect one of the tubes (either Air Inlet or Air Outlet) and unscrew the corresponding cap from the chamber.

- Load the sample, replace the cap, and then reinstall the tube.

- Under Log Files > Open a Log File, create a new file or open an existing file. If desired, configure the software to Prompt on Log, which will allow you to enter the sample weight with each measurement.
- Take a measurement.
- Under Measurements, tap the Log button.
