Below you will find some basic maintenance procedures that may be required from time to time.
Important: Power off the gas analyzer (disable the power supply or disconnect the power cable) before conducting any maintenance that involves disassembly or disconnecting cables. Disassembling the instrument or detaching or attaching head cables while the instrument is powered on may damage the instrument or result in a loss of data.
Changing the internal desiccant bottle
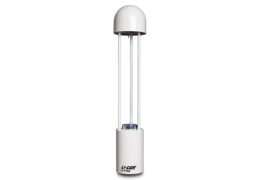
There is one internal desiccant bottle in the LI-7700. It is filled with Blue-Indicating Drierite®. The desiccant cap is above the circular plug located on the bottom of the top dome of the analyzer (see below). The desiccant bottle should be changed annually when the LI-7700 is used in humid environments. Desiccant bottles and recharge kits are available from LI-COR (part number 7700-950).
In the Calibration section of the Dashboard, observe the field that reads Optics RH:. Normally this should be near zero. If the indicator turns from green to red (indicating the optics RH: >30%), then it is time to change the desiccant. To change the desiccant:
- Remove the setscrew that secures the desiccant plug.
- If it is not in place, insert the knurled screw from the spares kit (part number 125-09760) into the desiccant plug. Grip the screw with your fingers or a pair of pliers and pull straight out to remove the desiccant plug.


- Remove the seal from the top of the replacement desiccant bottle.
- Insert the bottle cap first and replace the foam disk and cover. Press firmly to secure the desiccant cover and replace the setscrew.


Note: a droplet of saliva or dish soap applied to the O-rings can ease insertion of the desiccant cover.
Over time, the Optics RH: should approach zero. This may take several minutes to several hours, depending on the humidity level. There should be no need to perform any other maintenance procedures (e.g., zero or span) after this.
Cleaning the mirrors
The upper and lower mirrors are extremely scratch resistant, however, the mirror surfaces should be treated the same way you would treat the surface of an expensive lens. In general, refrain from applying a lot of pressure when cleaning a dry mirror. If the mirror is dusty, just wipe it with a soft, clean, moistened cloth. If a sticky substance, such as pollen, has built up on the mirror, a mild soap or a commercial glass cleaner such as Windex® can be used.
Note: Products such as Rain-X® can be applied to the lower mirror to help the glass shed water.
There may be the appearance of “spots” on the mirrors. These are normal and are the result of the manufacturing process. The spots are in the visible spectrum and will not affect reflectance near 1.6 microns, which is where the LI-7700 operates.
The washer reservoir uses standard over-the-counter windshield washer fluid. If fouling of the mirror is minor, tap water will work fine. Cleaners that contain methyl alcohol (methanol) and isopropyl alcohol are suitable. Refrain from using cleaners that contain powerful solvents such as acetone. As a general rule, if the cleaner is safe for automotive finishes, it is probably safe to use in the LI-7700 washer reservoir.
The washer should be filled with windshield washer fluid with a temperature rating suitable for the environment in which it will be deployed. For highly sensitive environments, select an environmentally friendly solution.
If your instrument has persistent noise, there may be invisible water deposits on the lower mirror. You may need to clean it more thoroughly. If needed, position the instrument vertically and flood the lower mirror with white vinegar. Allow it to sit for an hour and then rinse thoroughly with distilled water. Be sure that the mirror is free of solids that can scratch the surface, and then gently polish it with a soft cloth.
Important: Never use abrasive cleaners on the mirror. Refrain from using polishing compounds or toothpaste. These can permanently damage the mirror finish, which will require costly repairs.
Changing the thermocouple
The fine wire thermocouple should be replaced if the wire is broken or if it reads incorrectly. One spare thermocouple is included in the spares kit, and others can be purchased from LI-COR, Inc. (part number 9977-038). To replace the thermocouple:
Important: Power off the gas analyzer (disable the power supply or disconnect the power cable) before conducting any maintenance that involves disassembly or disconnecting cables. Disassembling the instrument or detaching or attaching head cables while the instrument is powered on may damage the instrument or result in a loss of data.
- Fully loosen the two screws (#1 Philips) that secure the thermocouple assembly to the bottom of the upper housing.
- The screws will be retained in the thermocouple base.

- Grasp the thermocouple housing and pull it straight out.
- It should slide out fairly easily.

- Insert the new thermocouple.
- The thermocouple has a protective plastic sleeve - leave it in place. Be sure the bend is directed toward the optical path. Handle the thermocouple carefully to protect the fine wires.
- Replace the two screws.
- Connect with the LI-7700 and verify that the temperature readings are correct.


Changing the LI-7550 fuse
Important: Power off the gas analyzer (disable the power supply or disconnect the power cable) before conducting any maintenance that involves disassembly or disconnecting cables. Disassembling the instrument or detaching or attaching head cables while the instrument is powered on may damage the instrument or result in a loss of data.
Early models of the LI-7550 have one fuse for the power supply. Later models have two fuses—one for the power supply and one for the accessory. To check a fuse, inspect it for evidence that it is burned and use an ohm meter to check the resistance. Resistance of <1 Ω (ohm) indicates that the fuse is OK.

Power Supply Fuse
The power supply is protected by a 5 A 125/250V, 5 × 20 mm fast-blow fuse (part number 439-04214). If the battery or other power source fails to power the instrument, check to see if the fuse has blown.
The fuse is located in the lower left-hand corner, as shown in Figure 8‑1. Replacement fuses (part number 439-04214) are in the spares kit. Use a flat blade screwdriver or your thumb to push down on the fuse holder cap and turn counterclockwise to release the cap.
Accessory Fuse
The accessory uses a 2 A Nano2 SMF Fuse. There is one spare fuse included in the LI-7550. If the heated intake tube will not power on or continuously triggers an error, check the fuse and replace it if necessary.
Changing the LI-7700 fuse
If the LI-7700 fails to power up when connected to a suitable power supply, check to see if the fuse has blown. The LI-7700 fuse is enclosed within the knurled fuse cover on the connection panel. One extra fuse (8A FAST 250V TR5 UL; part number 438-15034; early models used a 5 amp fuse. Contact LI-COR if you have questions) is included in the spares kit. To replace the fuse, disconnect the power supply to power off the LI-7700, remove the fuse cover and pull out the old fuse. Insert the replacement fuse and reattach the fuse cover.

Updating the software
Periodically we may release software updates for the LI-7700. We recommend running the latest PC interface software and embedded firmware for the best performance. The latest software is available from licor.com/7700software.
Updating the Windows interface software is a simple matter of downloading the latest version and installing it on your computer. Updating the embedded firmware involves downloading the embedded firmware updater, installing it on your computer, and loading the new firmware onto the instrument.
- Connect the LI-7700 to your computer or local network using the Ethernet cable.
- Open the file called li7700_updater.exe.

- Select the LI-7700 from the list and click Update Firmware.


