The leaf temperature thermocouple should require little maintenance. If it is not providing plausible measurements, it may need to be replaced.
Thermocouple maintenance
Readings from the leaf temperature thermocouples should be checked periodically, usually at the beginning of each day. A broken thermocouple is easy to replace, and if you have a broken thermocouple it’s better to find out before you make your measurements than after. To check it, go to Start Up > System Tests > Sensor Check and run the test.
Thermocouple replacement
The leaf temperature thermocouple (part number 9968-245) is mounted in a plastic holder that is inserted from below the bottom half of the leaf chamber. The thermocouple is terminated with a male 1/8" connector. If the thermocouple is damaged, the entire assembly is replaced. A failed thermocouple is indicated by leaf temperature readings around 9999.9.
To replace the leaf temperature thermocouple:
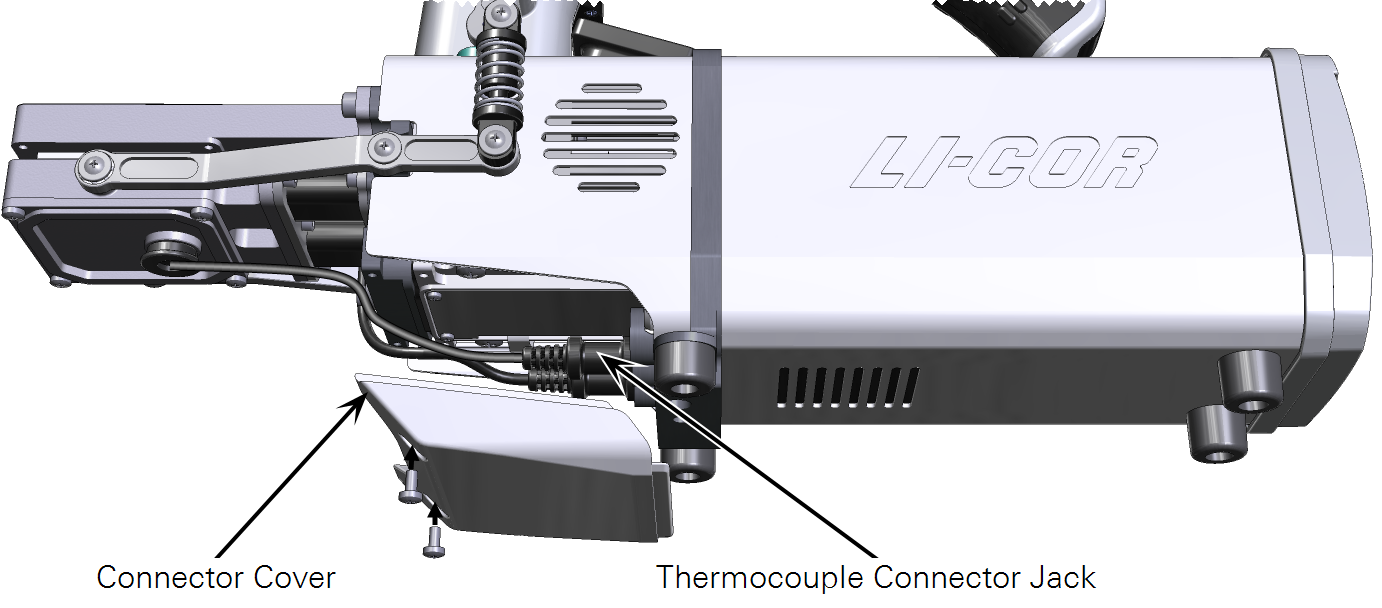
- Remove the connector cover.
- It is held in place with two screws.

- Unplug the thermocouple.
- Remove the thermocouple connector jack by pulling straight out.
- Remove the thermocouple from the leaf chamber.
- Pull straight down and out of the leaf chamber. You may have to wiggle it a bit if it is tight. Do not pull on the thermocouple cable.
- Insert the new thermocouple.
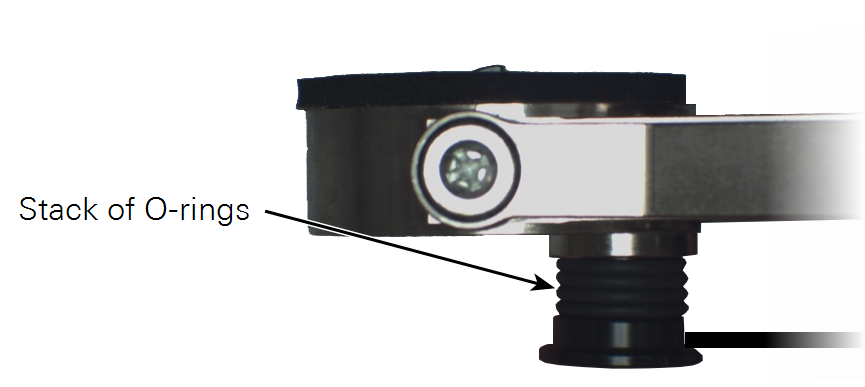
- Moisten the thermocouple retainer O-ring slightly, or use a minuscule amount of silicone grease. This will make it easier to install the new thermocouple.

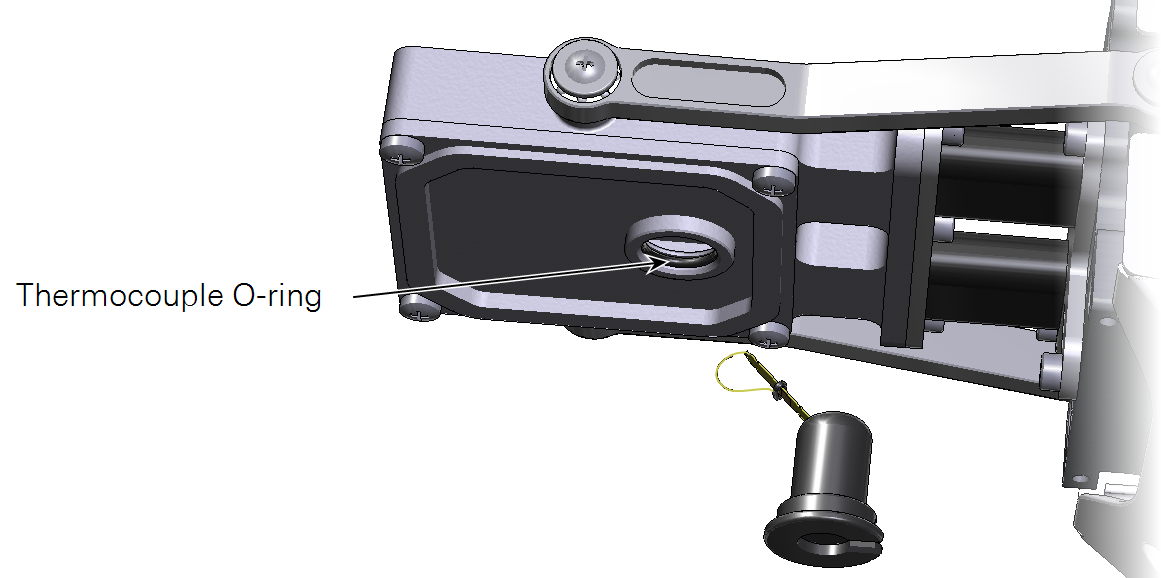
- Figure 9‑76. Maneuver the thermocouple through the lower chamber plate. Apply a dab of silicone grease to the O-ring to ease installation, if needed.
- Plug in the connector.
- Connect the thermocouple connector to the T1 or T2 connector. A dab of silicone grease will make this easier to install and remove.
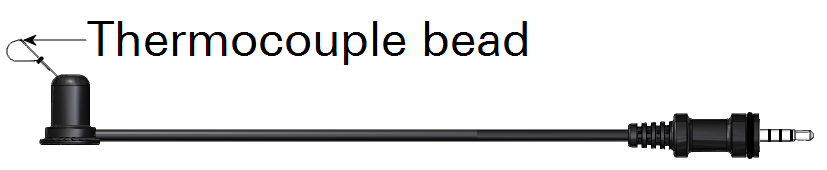
- Position the thermocouple.
- Position the thermocouple so that the bead extends just above the lower foam gasket when viewed from the side. This will ensure that the leaf is in contact with the thermocouple when the chamber is closed.

- If you are using an energy balance to compute leaf temperature, then position the thermocouple lower, so that it will not touch any leaf material.
- Install the connector cover.
- Check the thermocouple reading.
- Go to Start Up > System Tests > Sensor Check and run the test.

Note: Install 2 to 4 O-rings from the spares kit on the thermocouple shaft, as shown, to maintain the correct position. The required number of O-rings will depend on the angle of the thermocouple bead.