The lower chamber has two flexible ducts. The ducts may wear out over time. Follow these steps if you need to replace the ducts. This procedure describes the 3×3 cm clear top chamber, but the procedure is the same for other chambers.
- Remove the chamber from the head.
- See Removing a chamber. Set the chamber top-down on your workbench.
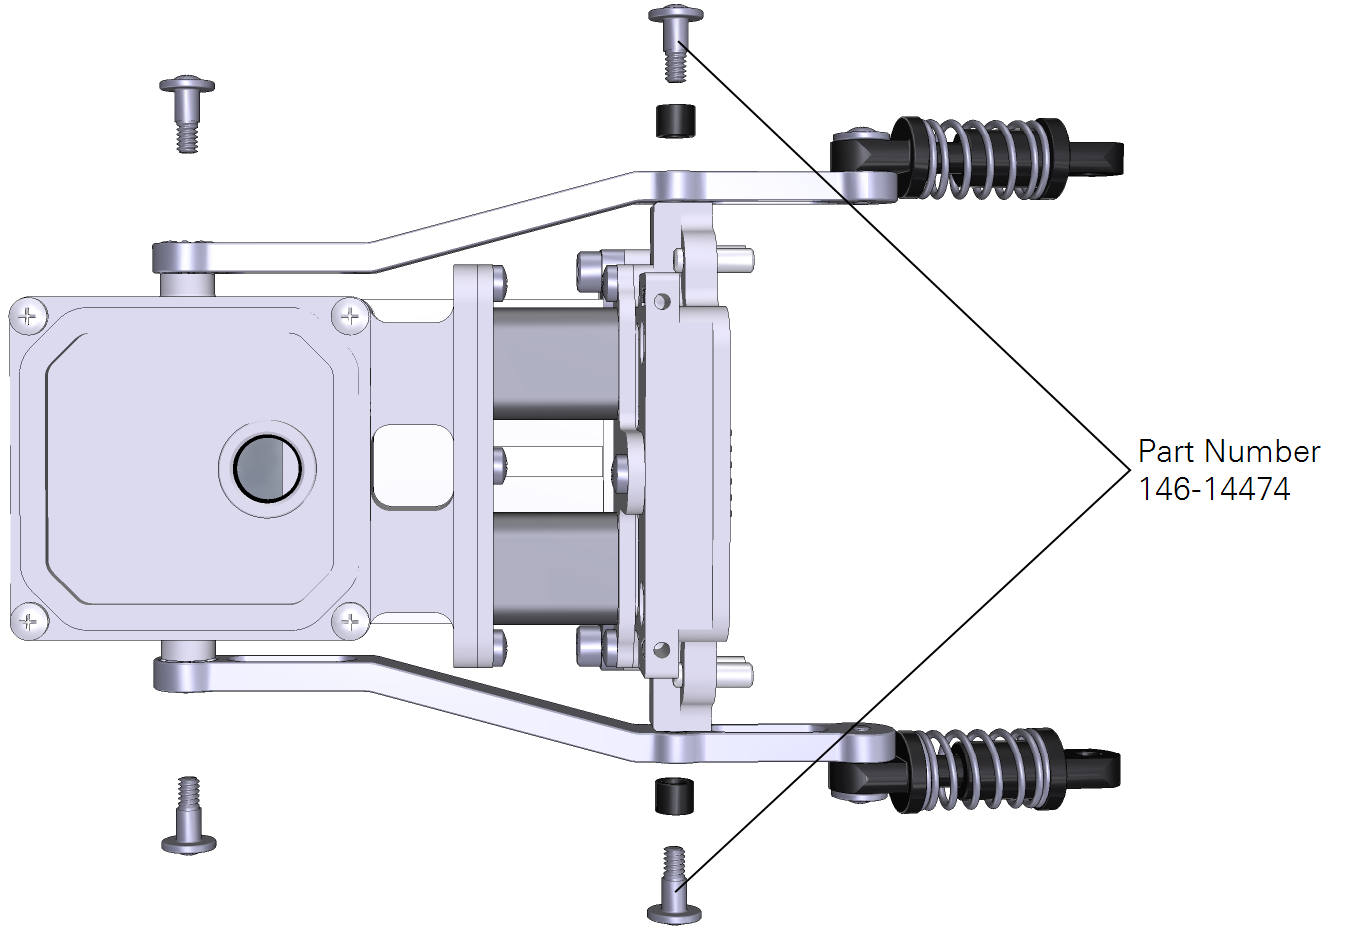
- Remove the hinge arms from the chamber.
- Caution: Avoid kinking the ducts. If they are kinked during removal or installation they may develop leaks.
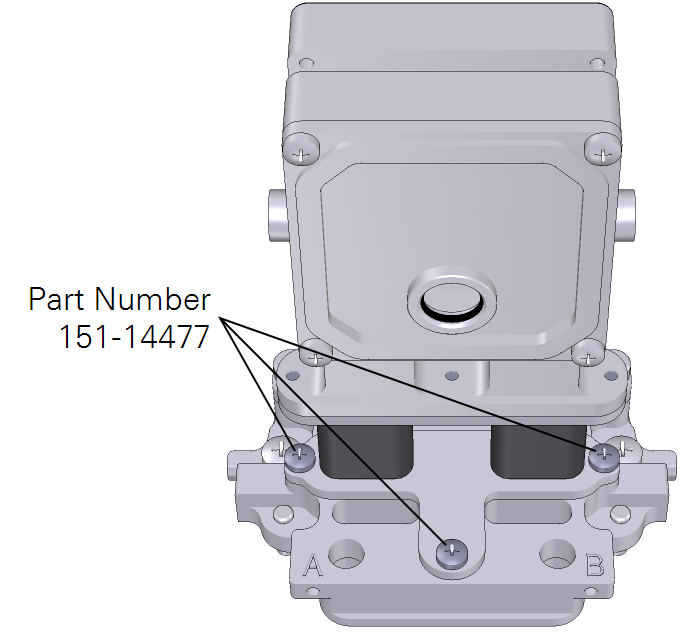
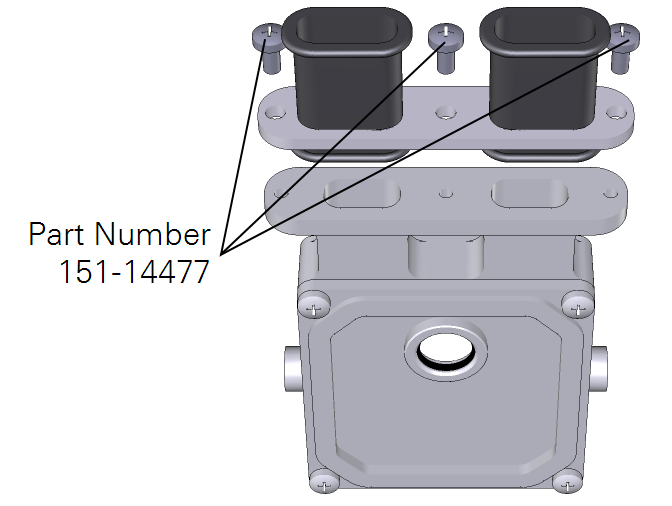
- Remove the three screws that hold the ducts to the chamber.
- You will have to shift the lower chamber out of the way to access the screws. After the screws are removed the lower chamber will separate from the rest of the chamber. Work the ducts out of the plate.
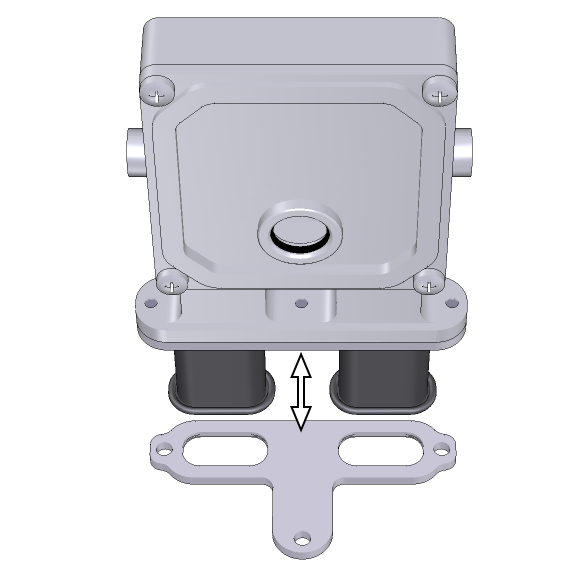
- Remove the ducts from the lower chamber.
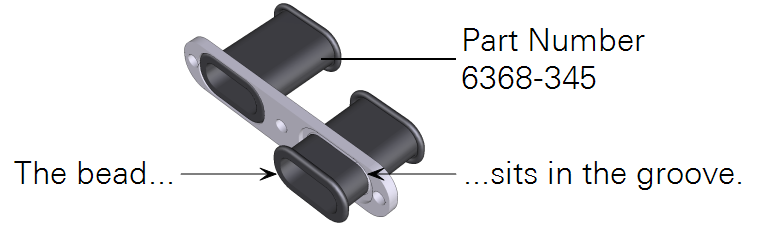
- Install the new ducts on the lower chamber first (the part removed in the previous step).
- Work the duct through the opening, being careful to ensure that the bead seats in the groove. Use caution and be sure that the bead does not get pinched.
- Tighten the screws snugly (1.1 N•m; 9.4 inch lbs if you have a torque screwdriver).
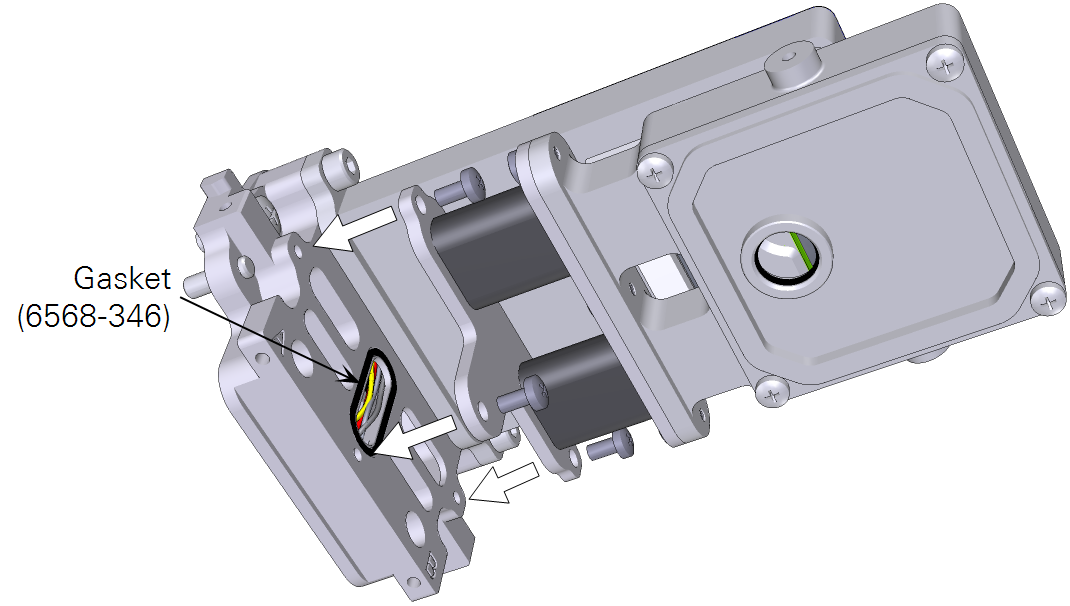
- Inspect the gasket that sits behind the other plate.
- Replace it if it shows signs of damage (cracking, pinched spots, or breaks). There is an extra in the spares kit (part number 6568-346).
- Install the lower chamber.
- Work the ducts through the opening in the other plate and install the three screws that hold the chamber. Tighten the screws snugly (1.1 N•m; 9.4 inch lbs if you have a torque screwdriver). Once again, use caution to be sure the bead does not get pinched.
- Install the hinge arms that were removed in Step 2.
- Tighten the screws snugly (1.1 N•m; 9.4 inch ounces if you have a torque screwdriver).
- Install the chamber on the head.
- Perform the sensor tests.
- They are under Start Up > System Tests, select Sensor Check.